Pagodas Project Part Five, Gilding and Toning

Hello everyone, welcome to the 5th blog about the Pagodas Project, which documents the conservation and restoration of a pair of monumental Chinese ceramic pieces from Brighton & Hove Museums collection. If you haven’t done so, please find our previous blogs on the project’s introduction, mould and casting, reconstruction and inpainting phases.
This month marks the second anniversary since we started this project, and as we come to the realisation of how close we are to concluding the work on the Pagodas, we are really excited to think how close these are to go on display in the Royal Pavilion, which is planned for May 2024. If all goes well, that’s when you’ll be able to enjoy them in their full scale, context and splendour.
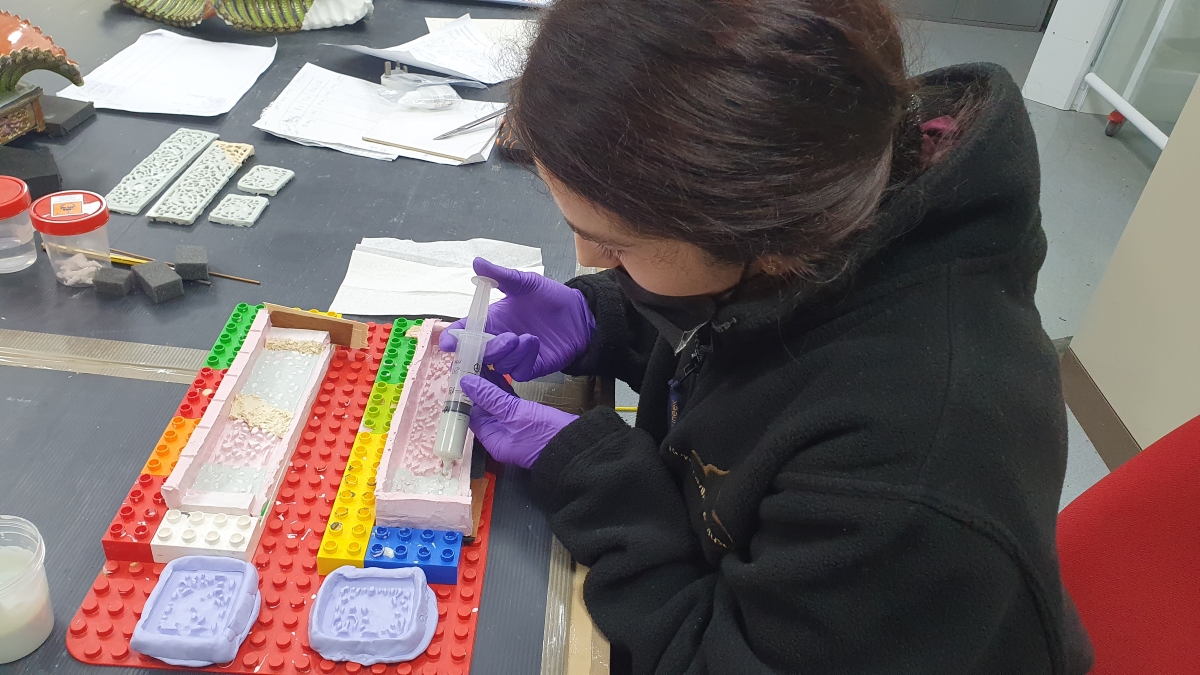
In this blog we will show you the gilding and toning phase that followed the acrylic inpainting phase of the Hxtal© resin casts and polyester resin used to reconstruct the ceramic losses in both pagodas.
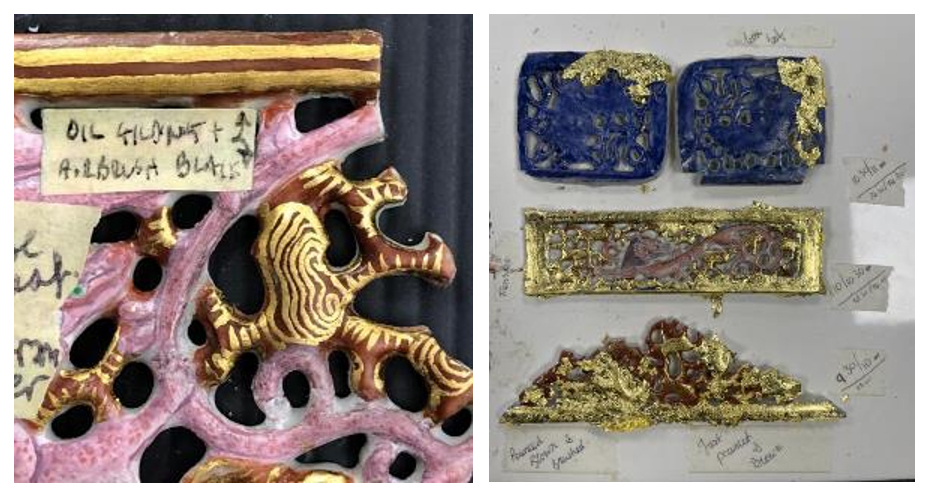
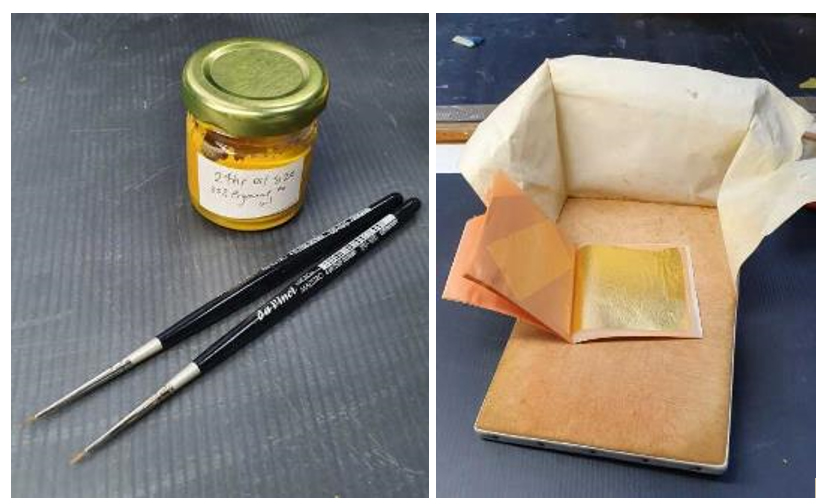
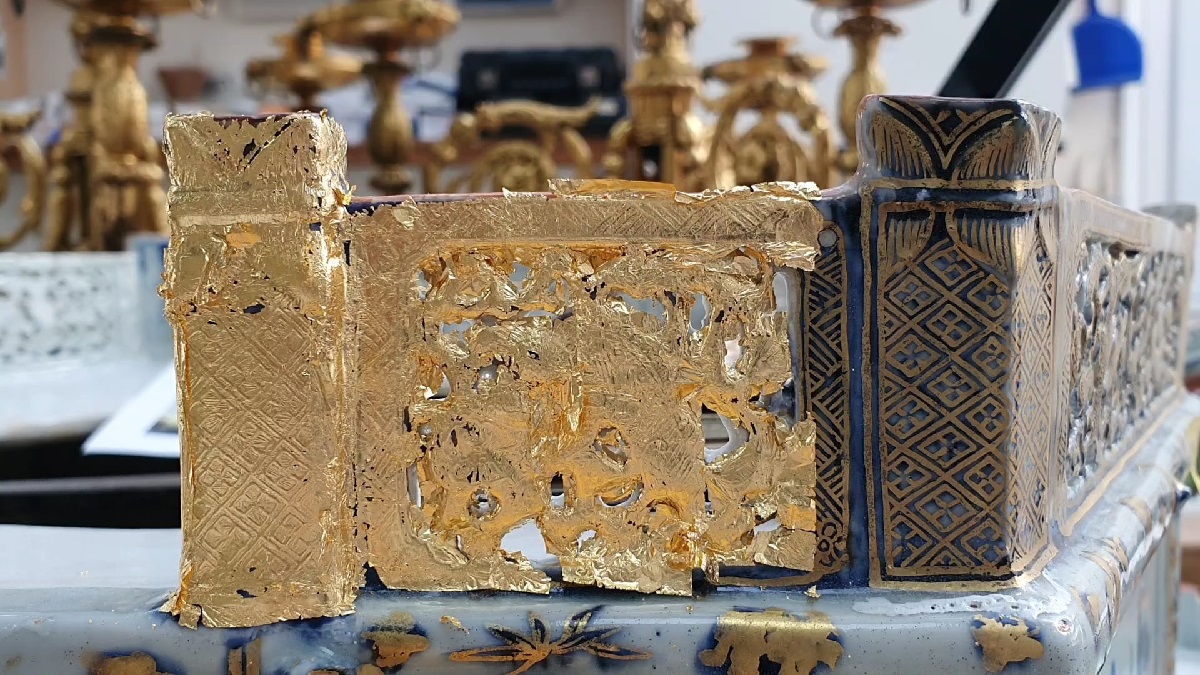
To replicate the original golden tones on the pagodas, we soon realised that acrylic colours and mediums missed the reflective and smooth desired effect we were aiming to mimic. We tested colours with mica pigments but textural and reflectiveness levels were not adequate, so we moved on test applying gold leaf over oil size. Oil size is an oil-based mordant that can be brushed on and goes tacky after a period of time, allowing gold leaf to be applied before it hardens fully.
We tested both 3 hours and 24 hours oil size achieving two distinct results, the latter providing a crispier and smoother gilded texture. We used loose, regular gold leaf.
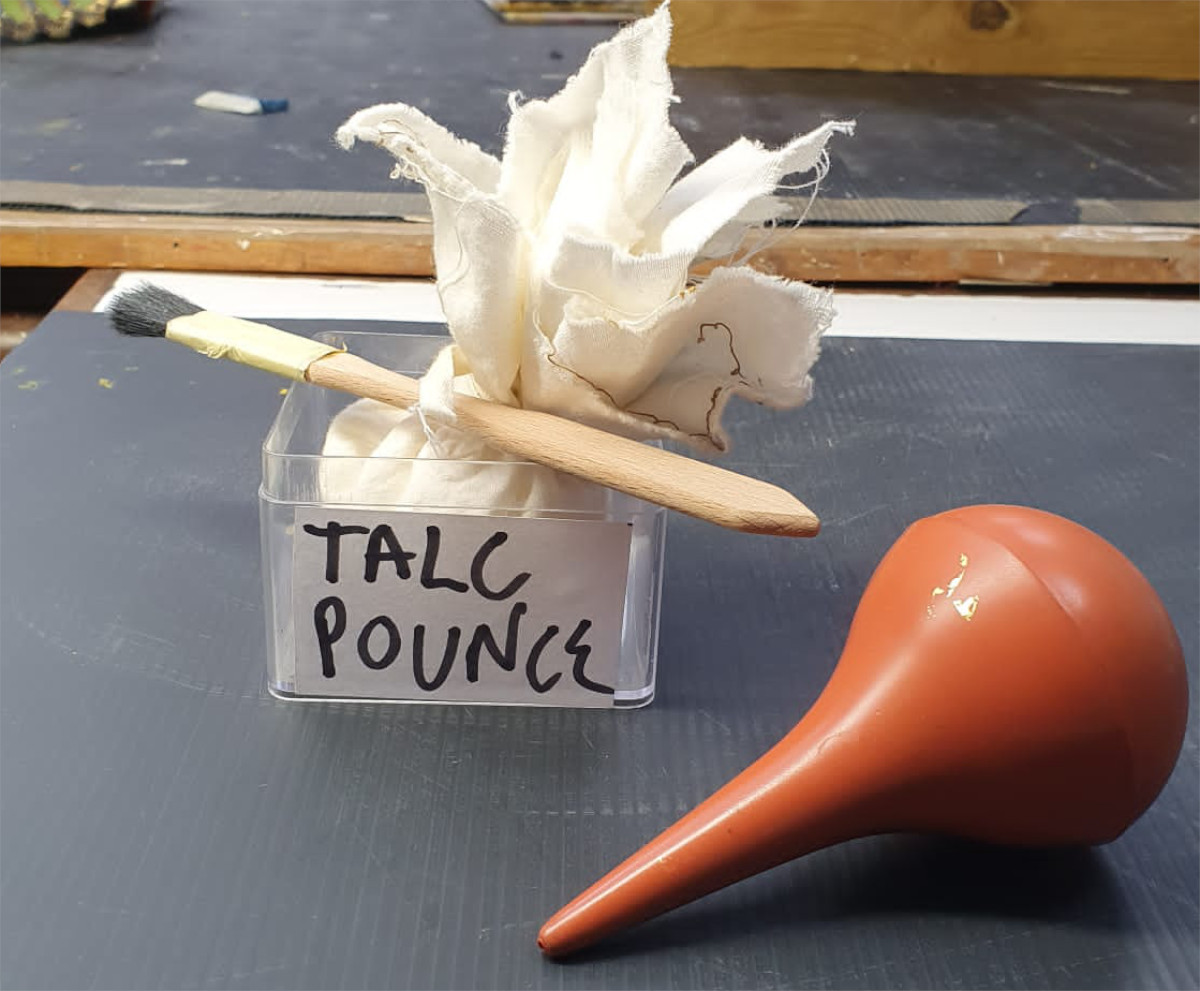
Before applying the size, we prepared the resin surface by applying talcum powder (very fine hydrated magnesium silicate) using a ‘pounce’. This is to avoid the gold leaf sticking to areas where the size was not applied. Excess talc was removed lightly using a blower, and a soft haired brush.
Initially, we encountered some setbacks with shrinkage of size lines and gold leaf adherence to the overall Lascaux coated surface. We later tested successfully and added an extra step prior to the talc application, using a 6000 to 8000 grade micromesh to gently abrade the glossy surface, which helped it hold more talc particles and provided a micro-texture to the surface that the oil could better grip to.
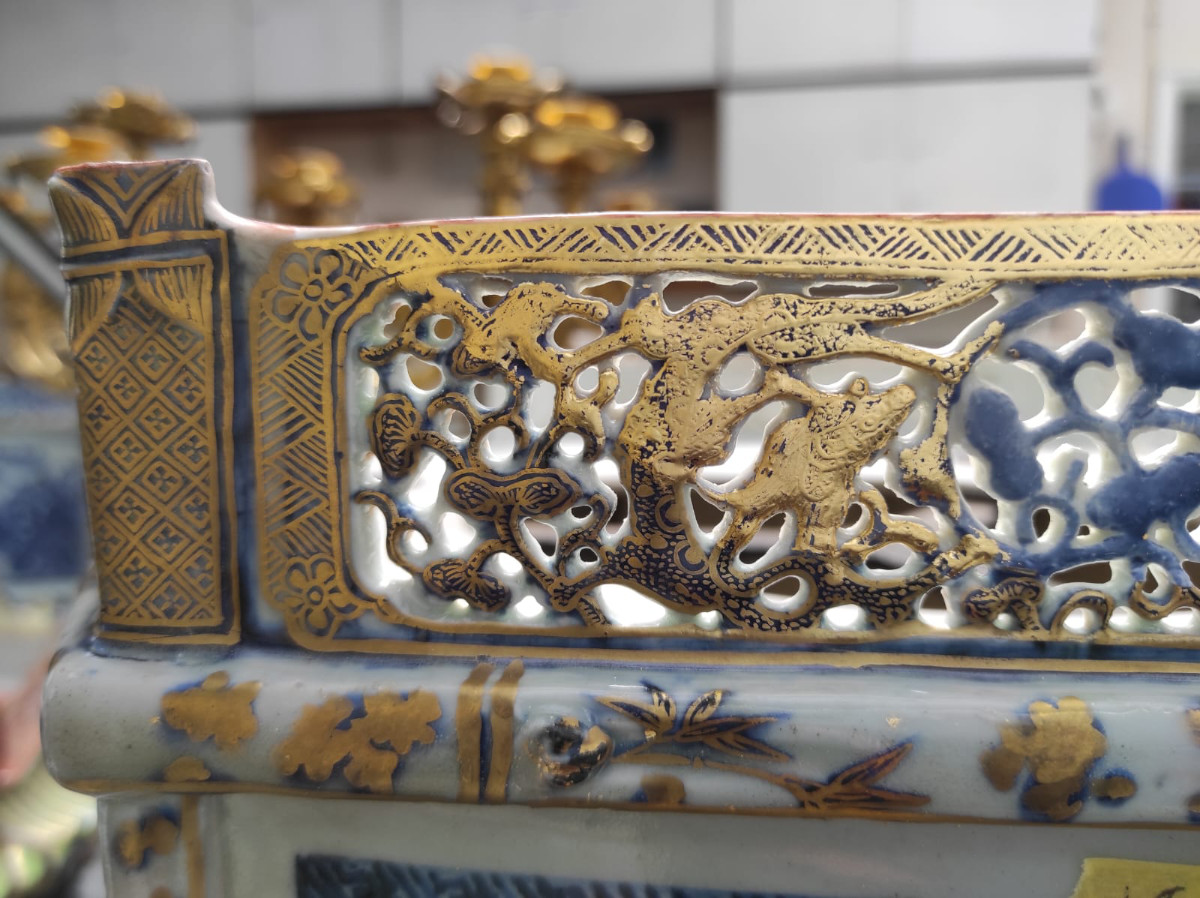
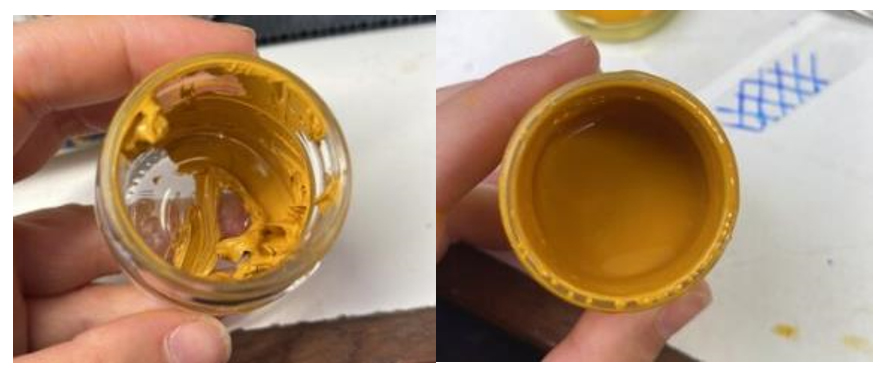
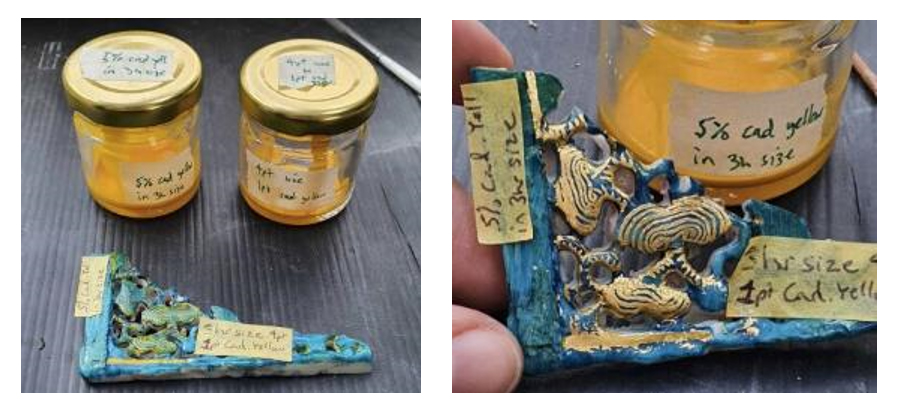
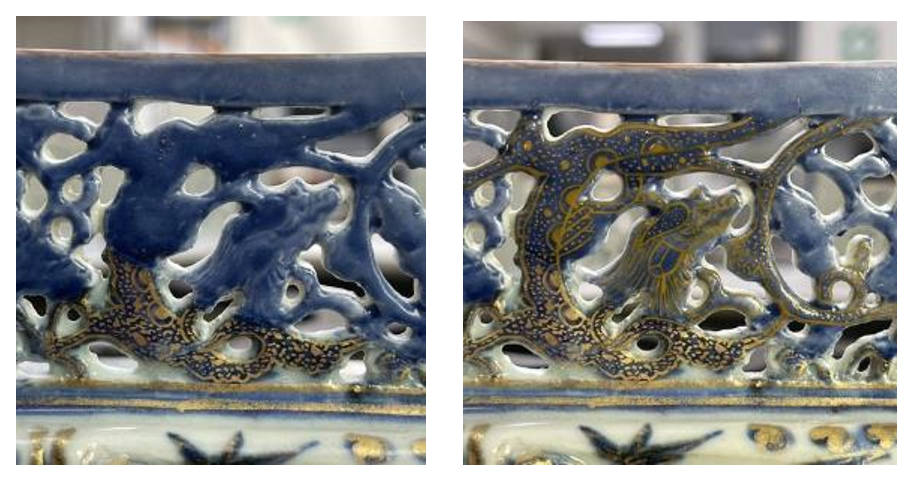
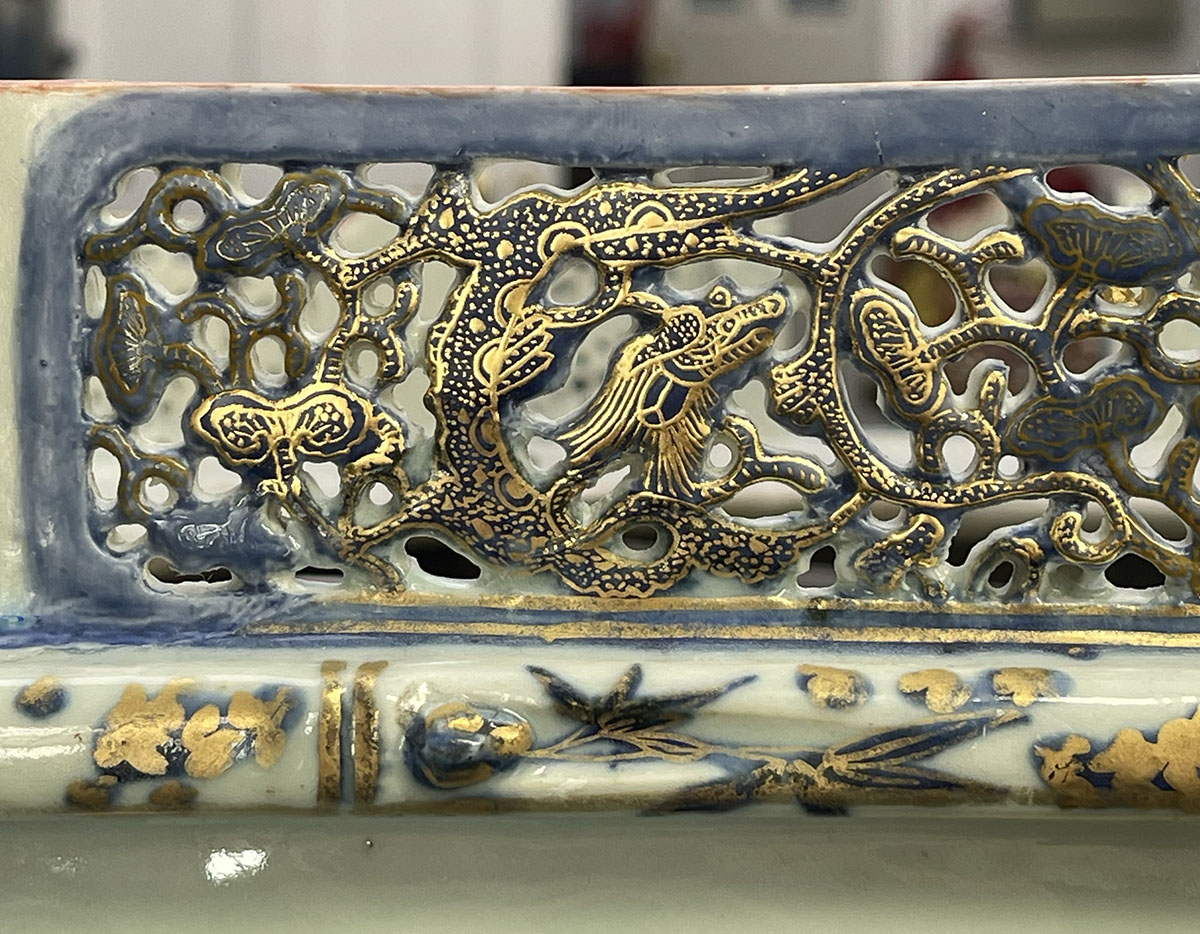
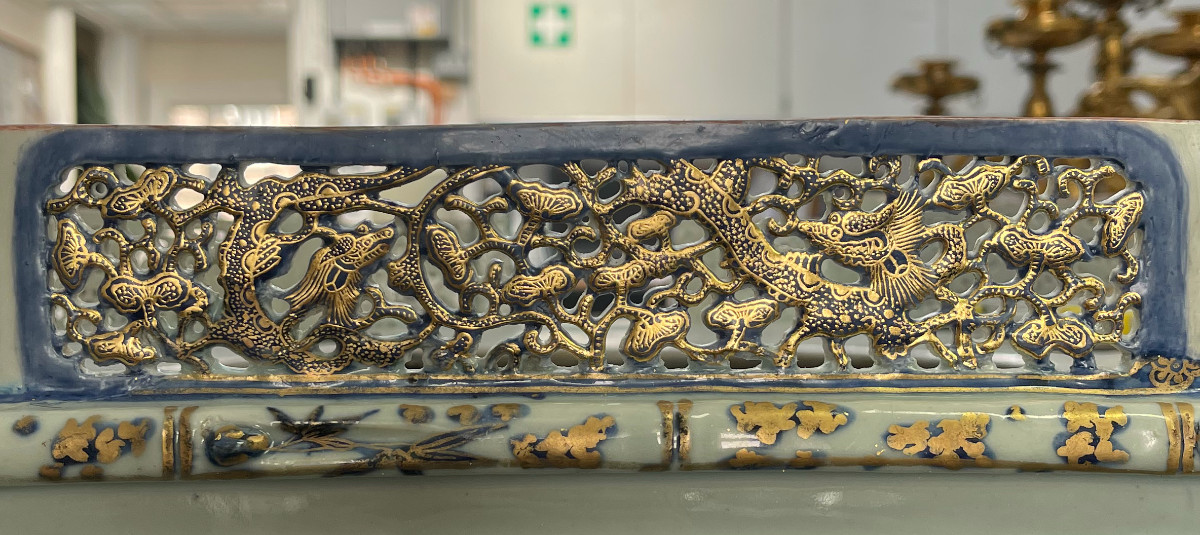
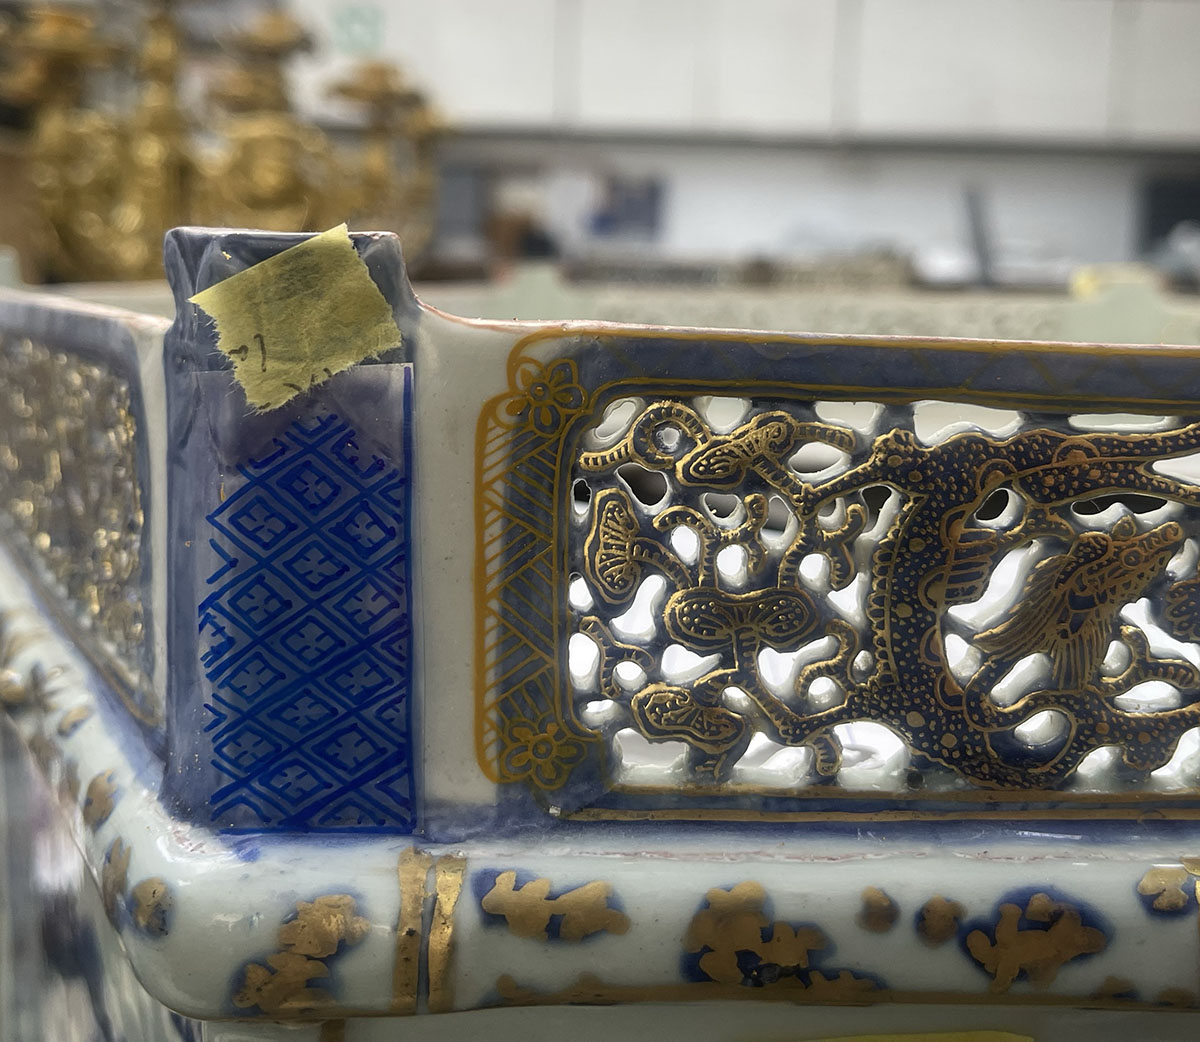
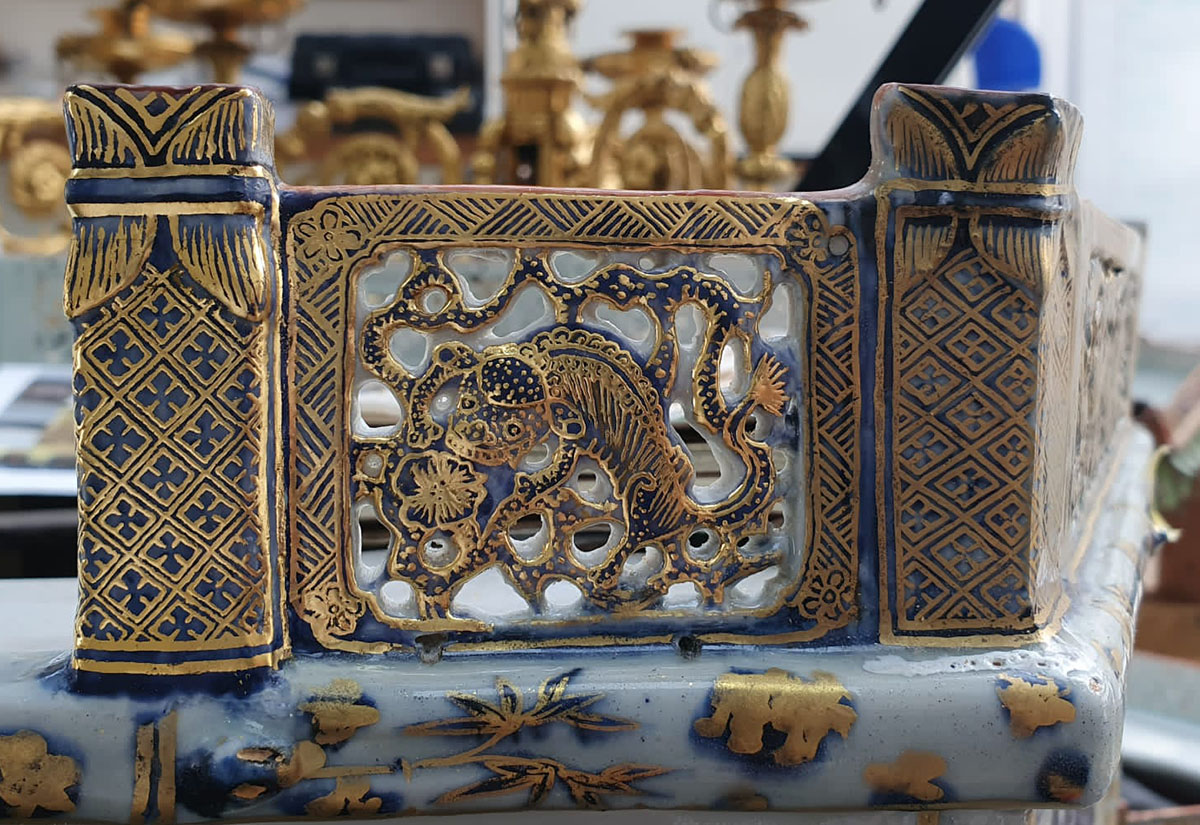
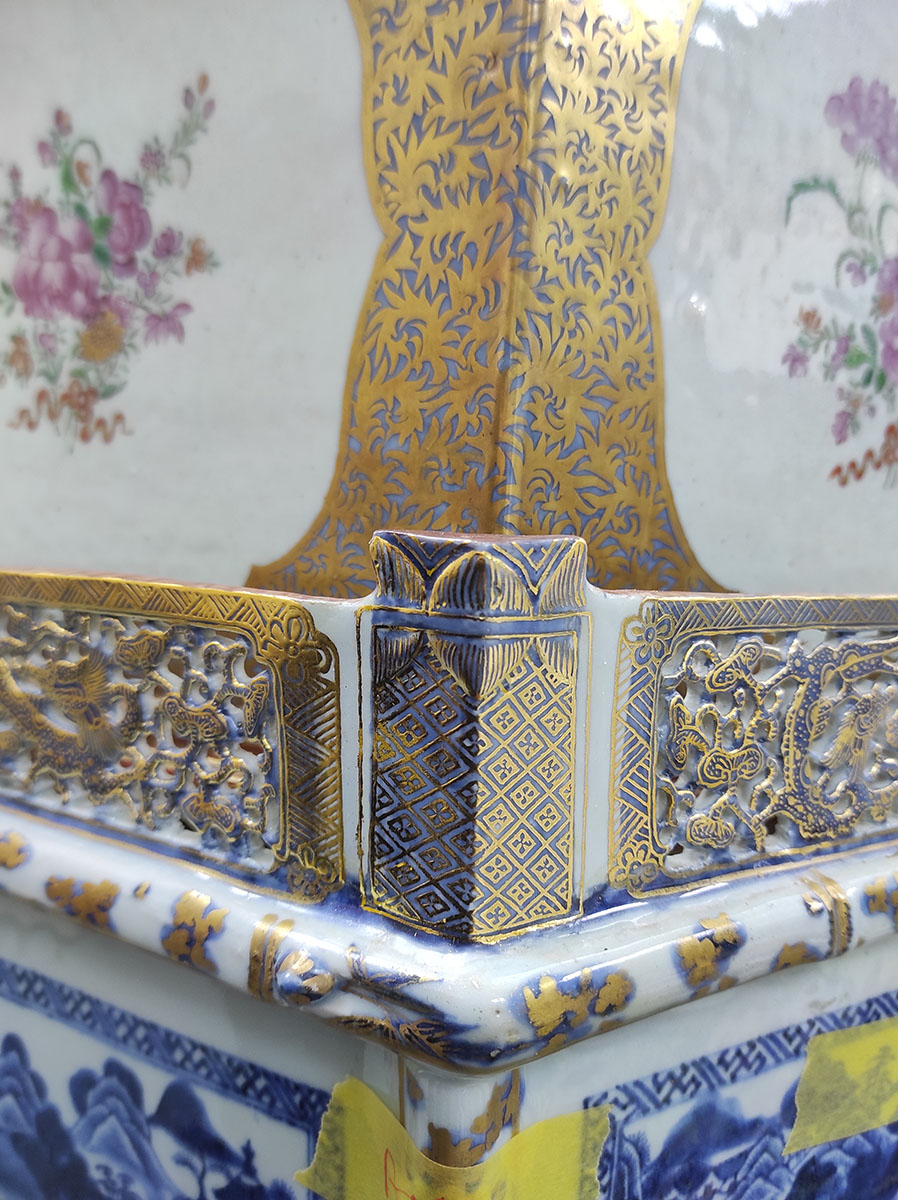
We used clear Kolner Classic Mixton 24h oil size that we have pigmented ochre-yellow with a mixture of oil pigments (cadmium yellow, cadmium red, titanium white & mars black) in 20% to 30% pigment content in oil (weight by weight). This helped with visibility whilst recreating the composition of intrinsic dragons and patterns for the balustrades and columns.
We used very thin brushes (between 5/0 and 20/0 sizes) to achieve the fine lines required, cleaning them regularly with white spirit to avoid the size accumulating too much and preventing suitable flow of the size from the brush. Sizing was done very carefully and at a slow pace to avoid mistakes and minimise disturbing the already prepared surface.
When a mistake was made we used Exxsol DSP 80/110, a fast evaporating, dearomatised hydrocarbon solvent, to remove the oil size and clean the affected area, avoiding laying any gold until preparing the surface with mesh and talk once again.
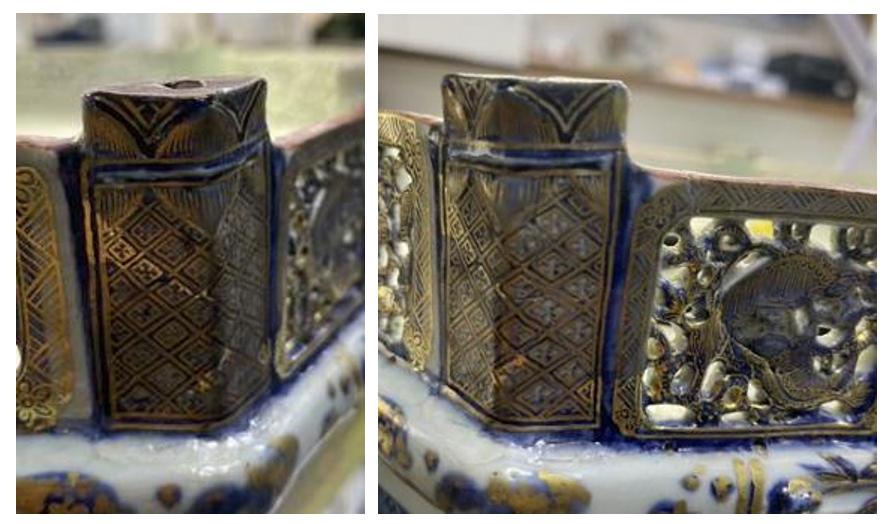
We used the clear Kolner mixton size version in identified areas that required some degree of surface distress of the gilding to give continuity to the worn out condition of the original fired gilding.
For more complex gilding compositions, we started studying and practicing by drawing the patterns onto Melinex polyester film, to test the dimensions and the correct layout before applying the size. The lay of the gold leaf was done the following day or within a close to 24h window.
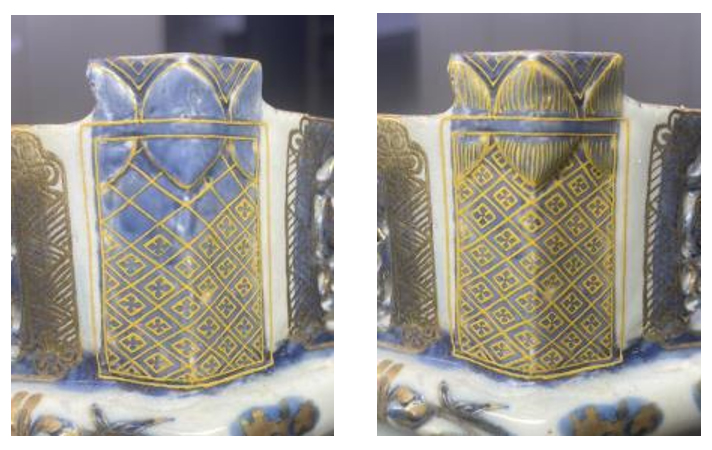

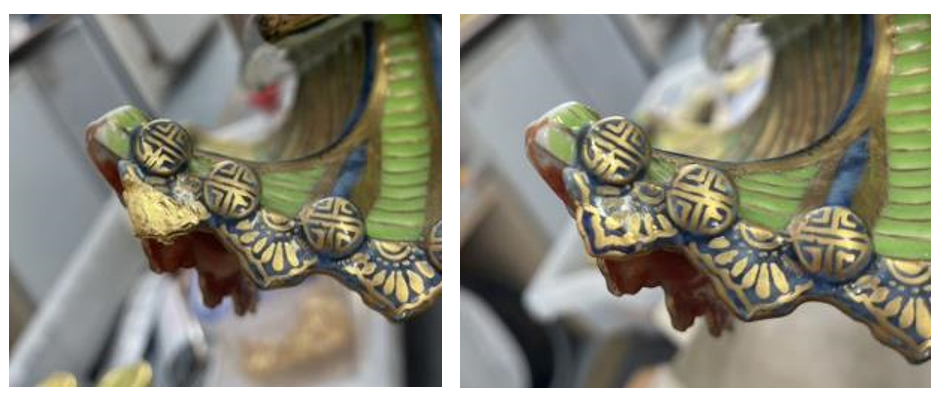
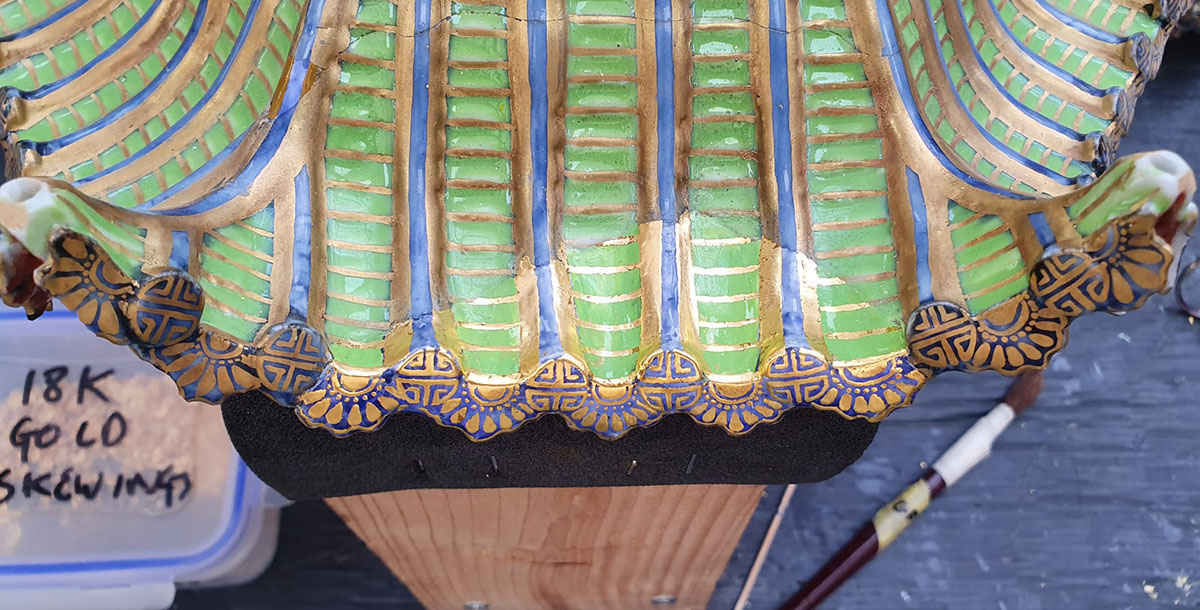
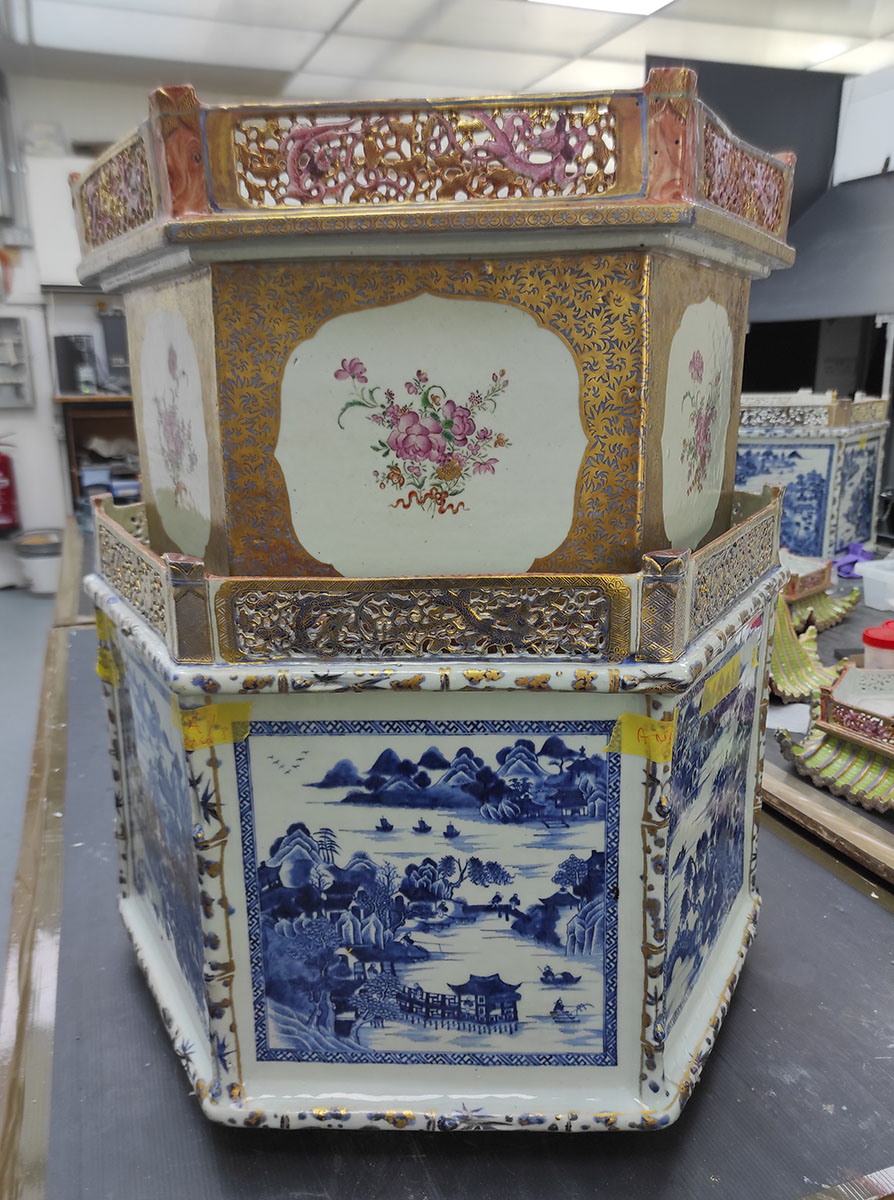
The day after the gold had been laid, excess gold was removed. This ‘skewing’ was done with a long-haired bristle brush with the loose gold being collected for sale back to a gold merchant. We were really amazed with the results and seeing the balustrades fully recreated was a high point for us.
We continued oil gilding the columns, which were slightly more difficult due to their geometric and symmetrical pattern. We used measurements and visual aids to help us achieve a symmetrical dimension. The outcome of the gilding was really consistent and worked well when applied onto larger areas like the roof tiers and in smaller tips or very small localised areas.
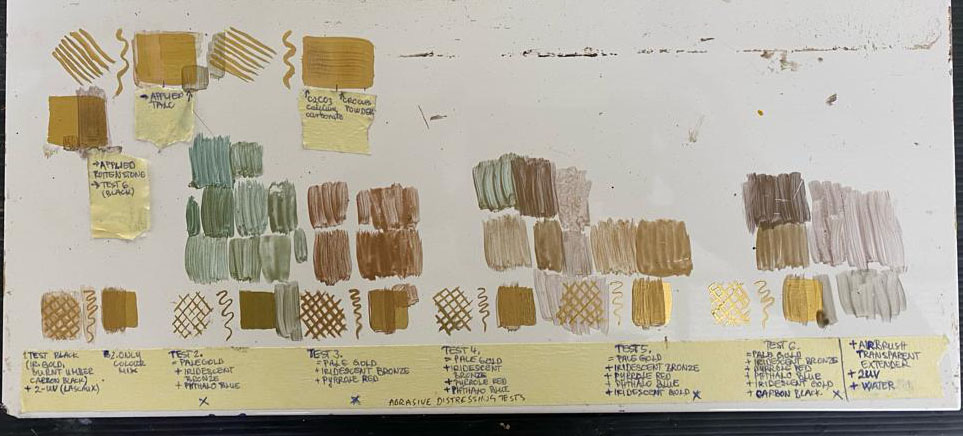
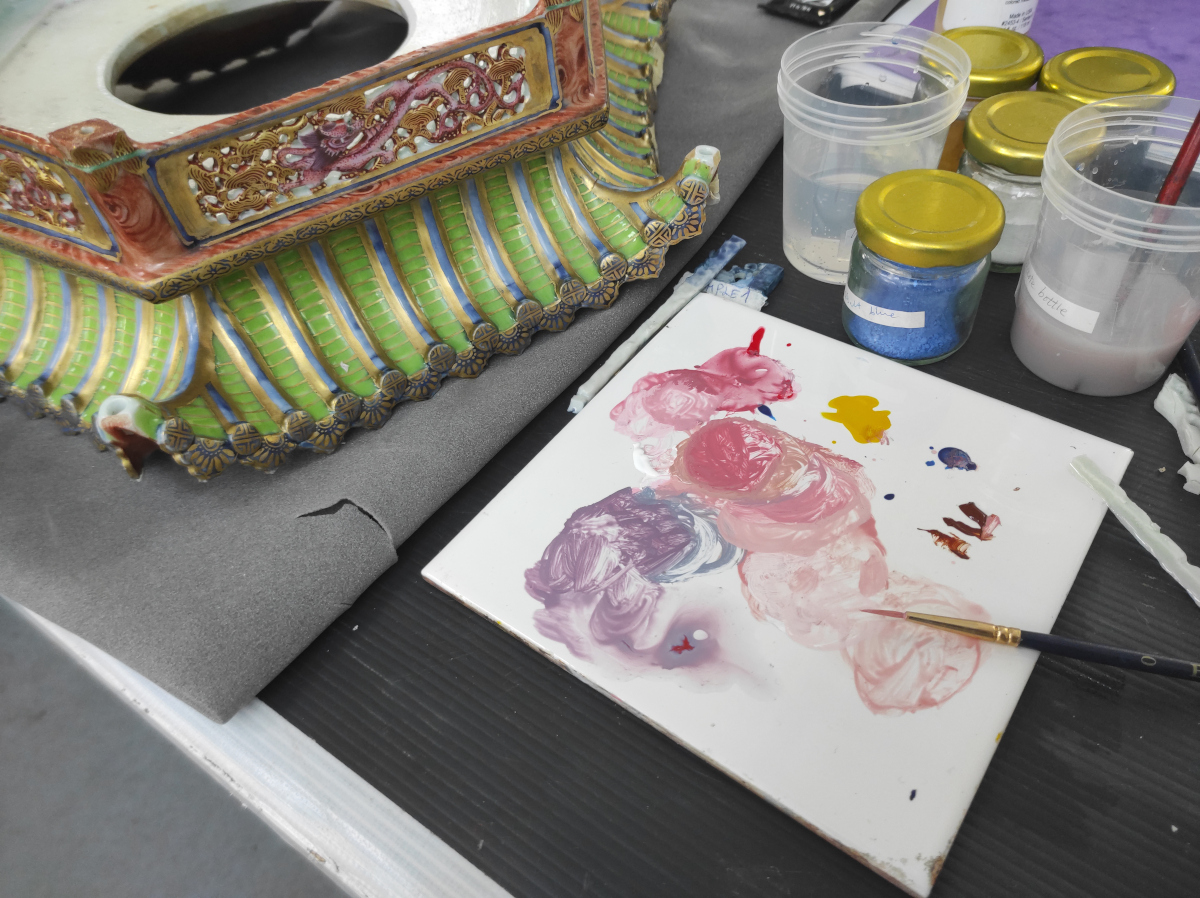
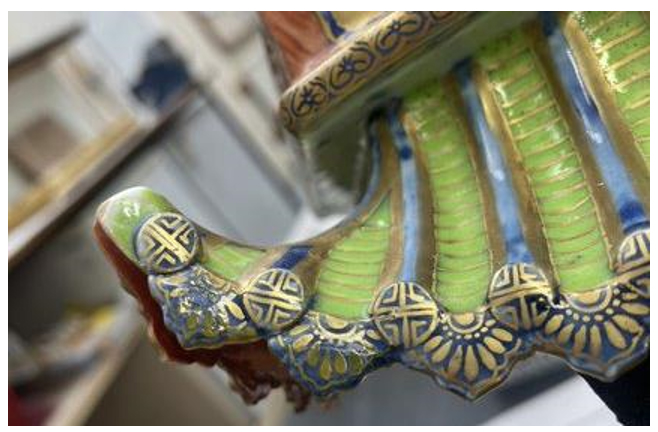
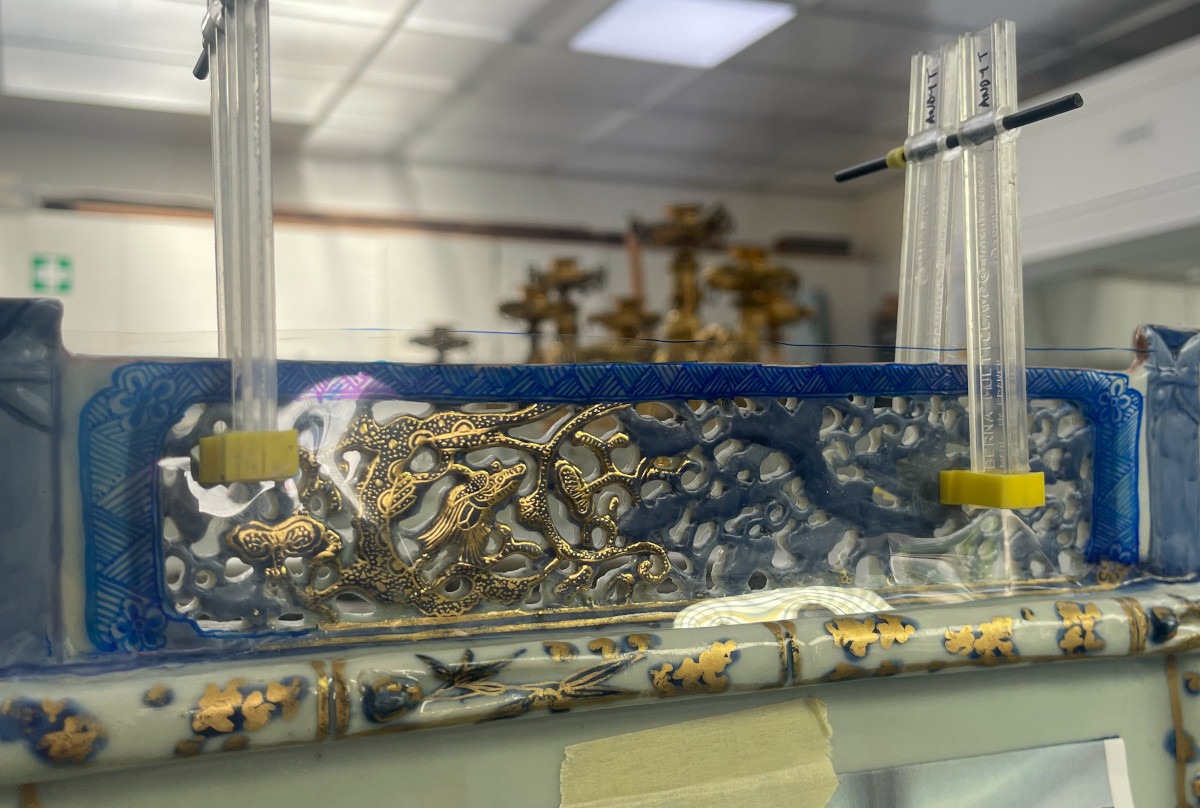
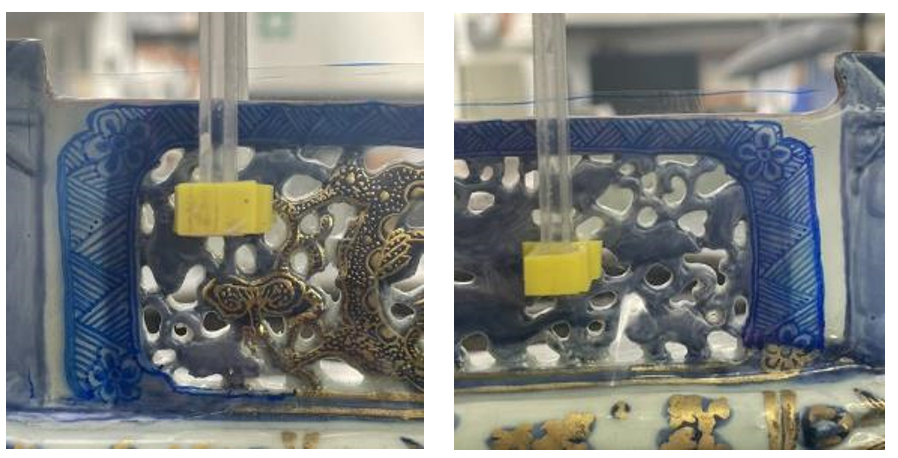
After gilding, the toning was the final stage of the colorimetric restoration for the pagodas. With toning, we blended visually all the new applied colours and gilding with the original ceramic tones. A series of toning tests were done which resulted in a total of 4 pre-mixed colours to be used accordingly with the background areas.
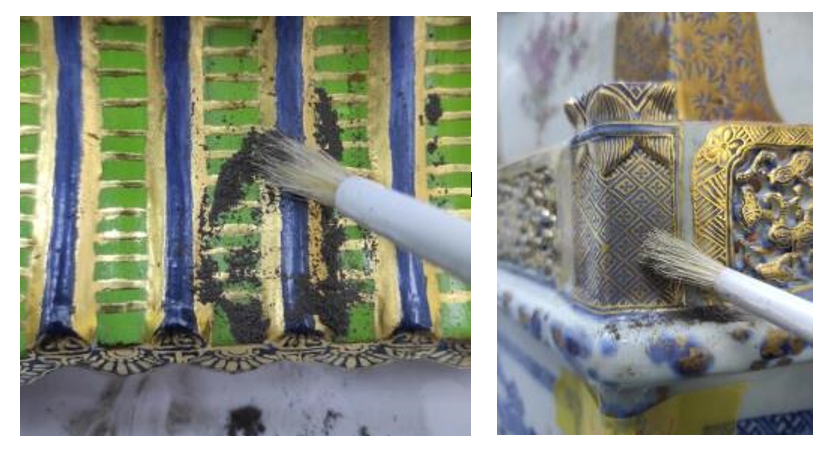
Before applying acrylic colours onto the newly gilding areas, we abraded the gold surface with rottenstone (tripoli) fine powder using a bristle brush to reduce the high shine and reflectiveness. It could also be used to wear through gilding where it was required to match worn original gilding. Once matted down, we applied layers of mixed acrylic colours (phthalo blue, pyrrole red, carbon black) and mica pigmented acrylic colours (iridescent gold, pale gold, iridescent bronze), water, Golden airbrush medium and Lascaux 2UV MAT, to achieve the ideal tones.

Toning testing started on the roof areas where straight and thick lines are present. Pre-mixed colour testing successfully suited the area by matching the shine and tone of the original.
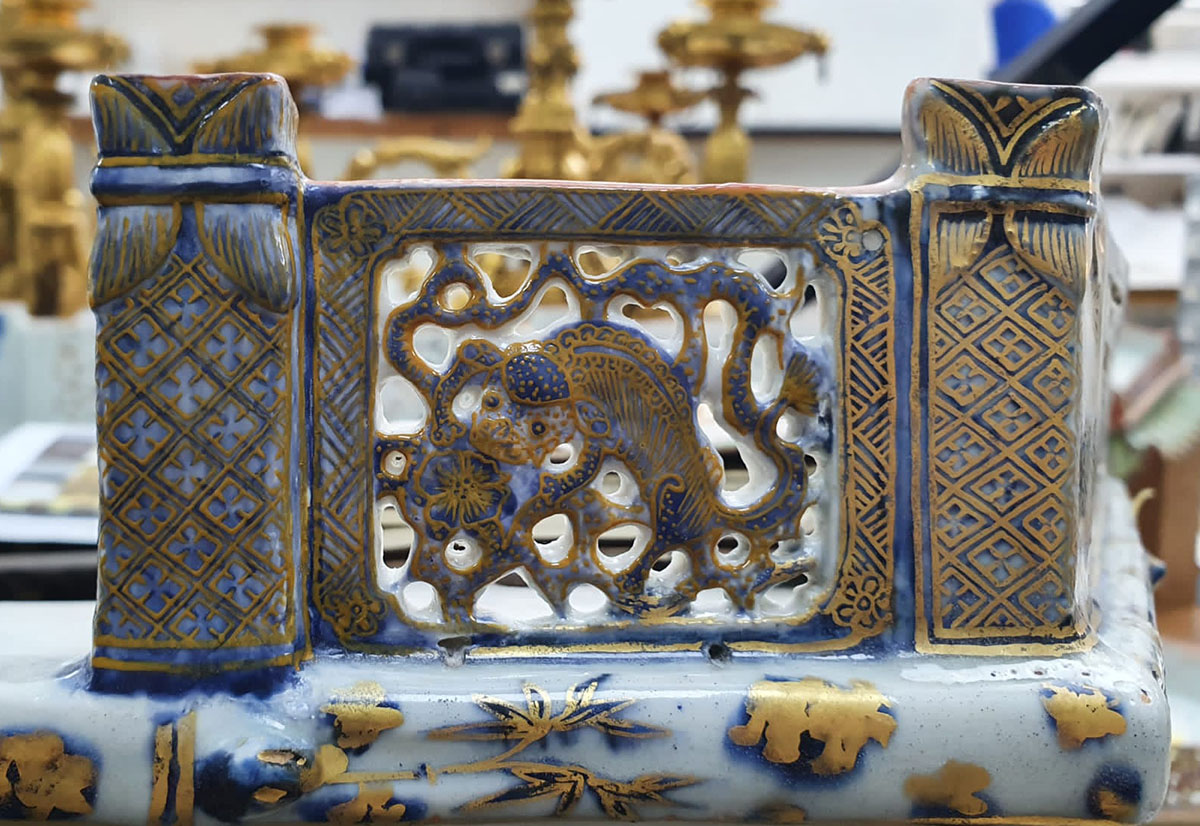
The next areas of testing were the balustrades on the largest tiers which had a blue background. For this purpose, we assembled the base tier with the next tier in size, which have large areas of original golden tone. The purpose was to match the tone of the new gilding with the overall original golden surface of the two tiers, homogeneously. This helped us decide which gloss effect and tone we needed to recreate. Again as a first step, we abraded the new gilded surface with Rottenstone© and after toning applied a final varnish of Lascaux 2UV MAT and Lascaux 2UV GLOSS in a 1:1 mixture.
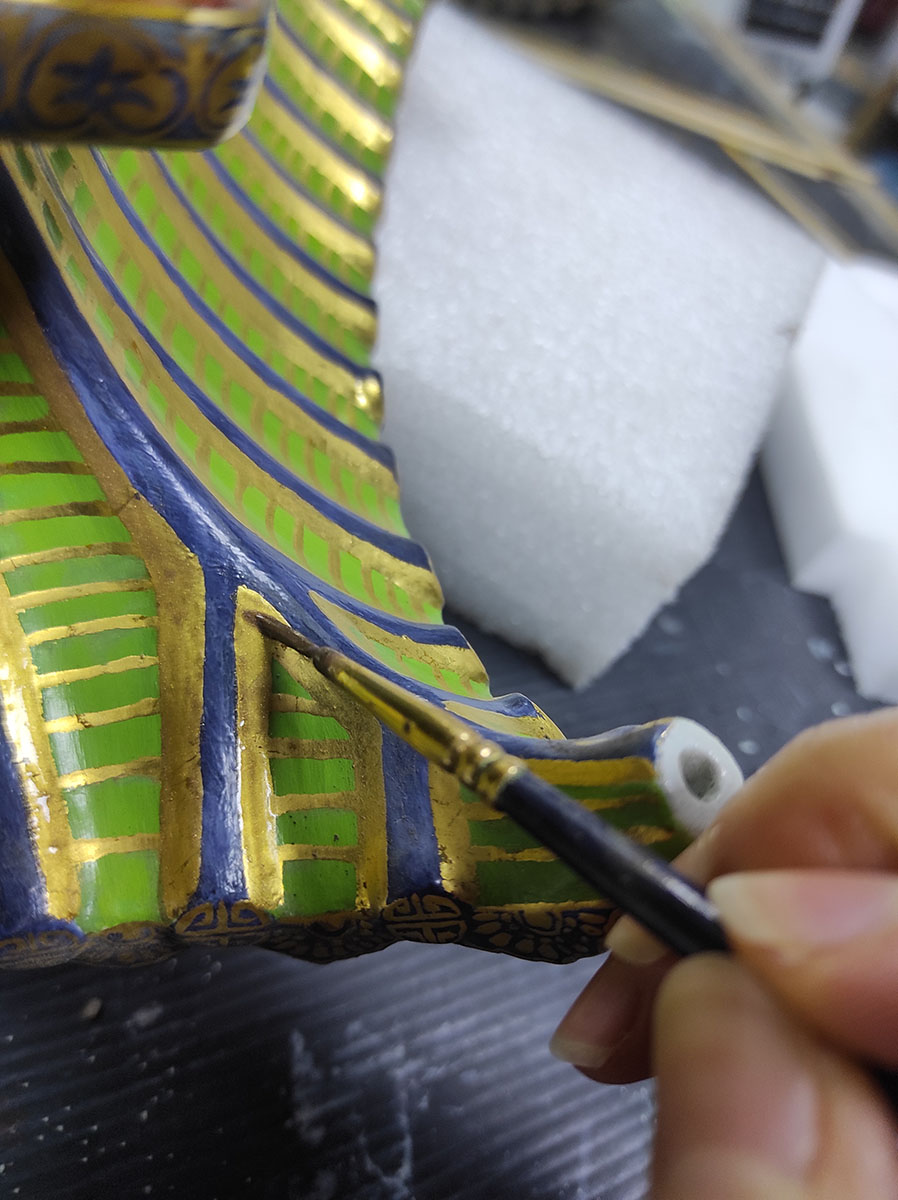

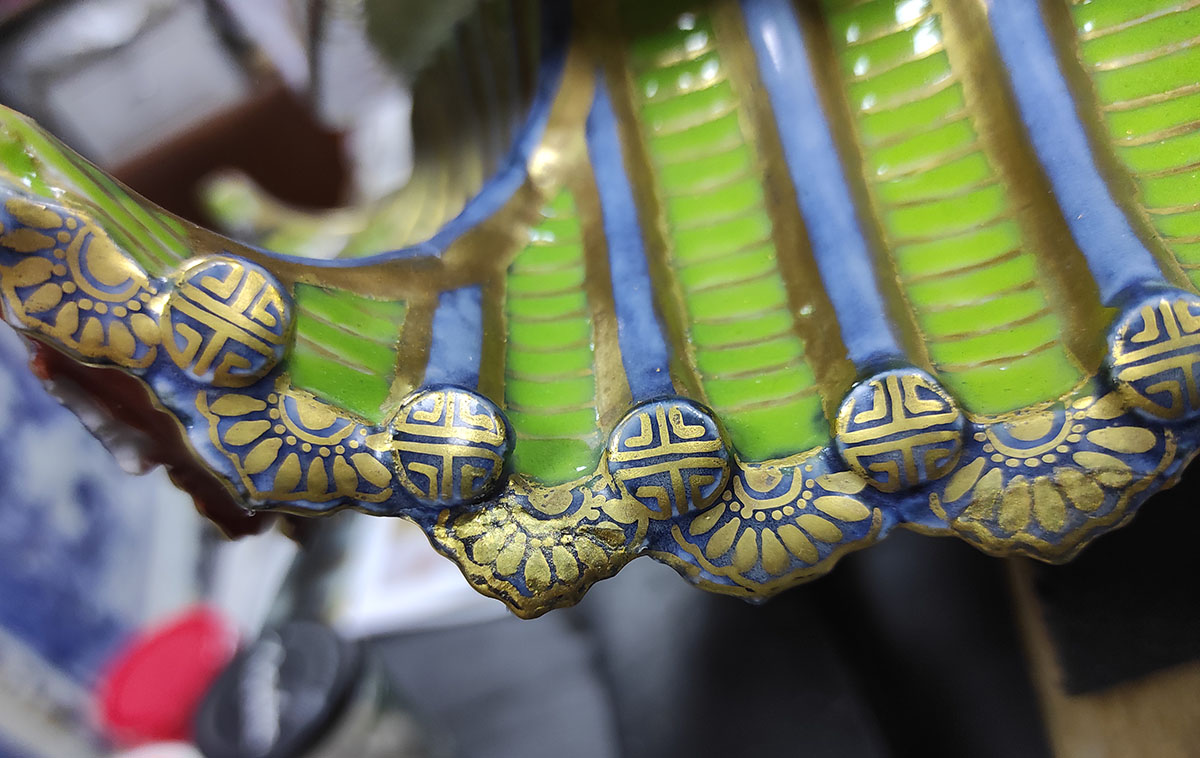
In certain areas we have experienced setbacks with toning. In decorative areas with thin lines together with roof tips areas we had different results with the colour mixture. The mica pigmented colours resulted too grainy and shiny in reflection. We also tested using only acrylic colours and mediums in these areas, but the desirable effect is not there yet. At this stage we are still testing to find the best suitable solution.
Currently we are also working on the reconstruction and gilding of ornamental elements for the Pagodas. Stay tuned for our next blog, here’s a sneak peek.