Pagodas Project Part Four, Inpainting
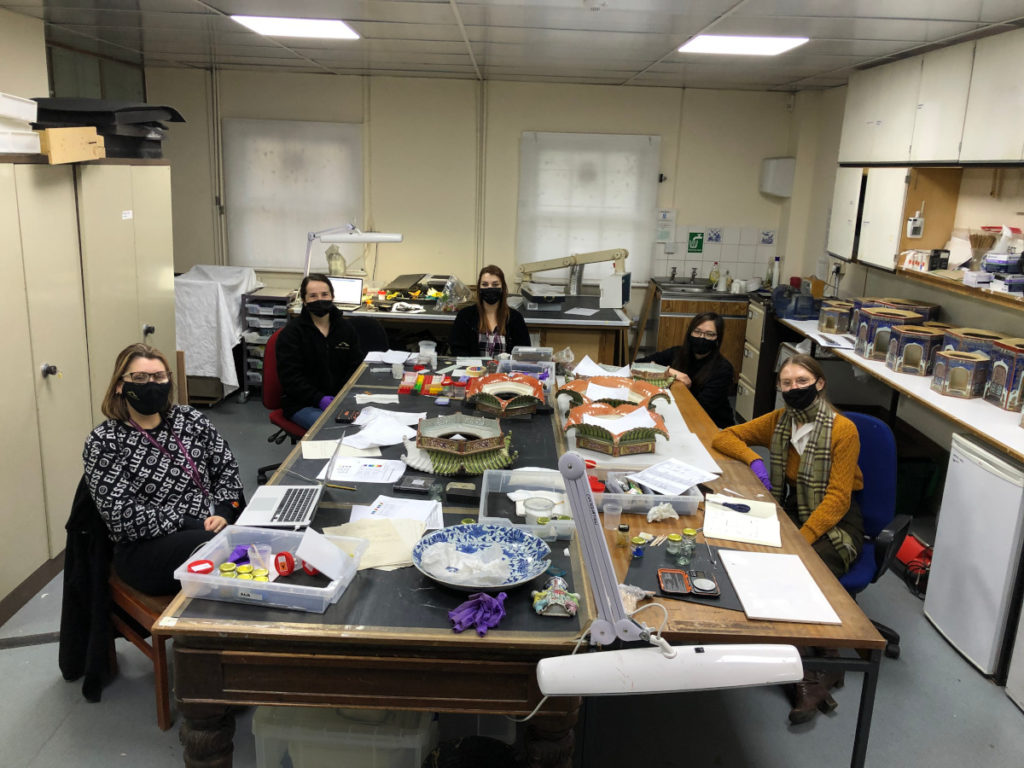
It is been more than a year since we started the Pagoda project and it is now coming close to the final stage.
If you would like to learn how we started the project visit Introducing the Pagodas Project. In Part Two you can find out how we cast and refine epoxy replicas. The longest phase of the project was the reconstruction of damaged areas, and if you would like to check the results visit Part Three, The Reconstruction.
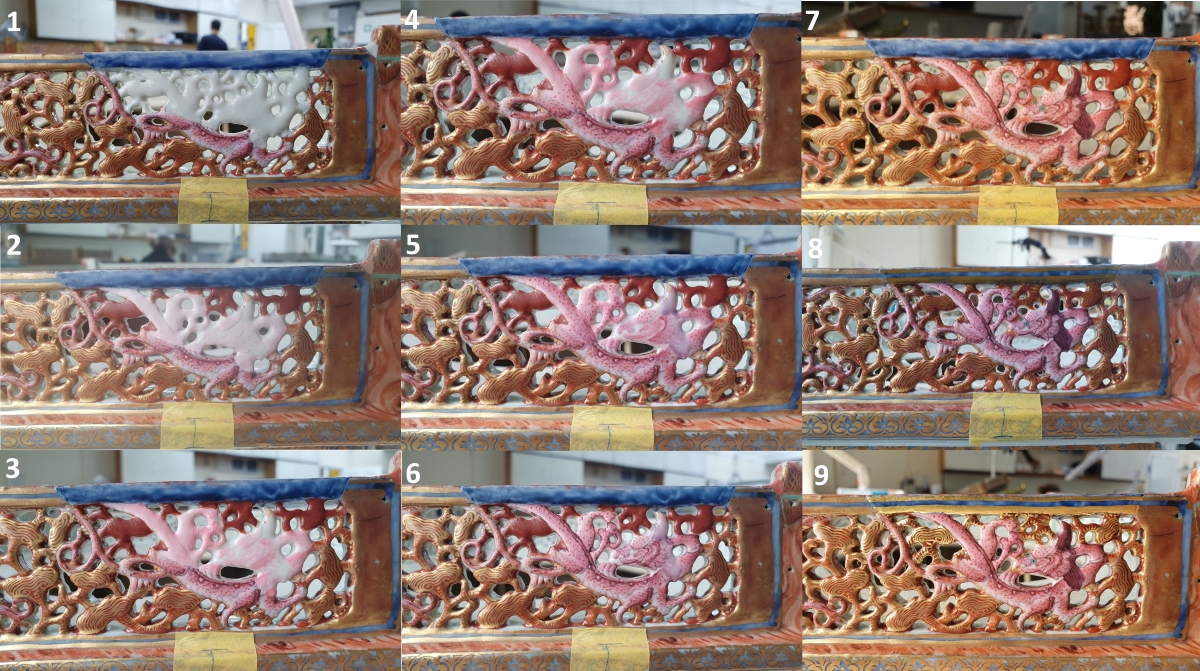
The next exciting step we looked forward to was inpainting the reconstruction surface before the final stage of applying the gold decoration.

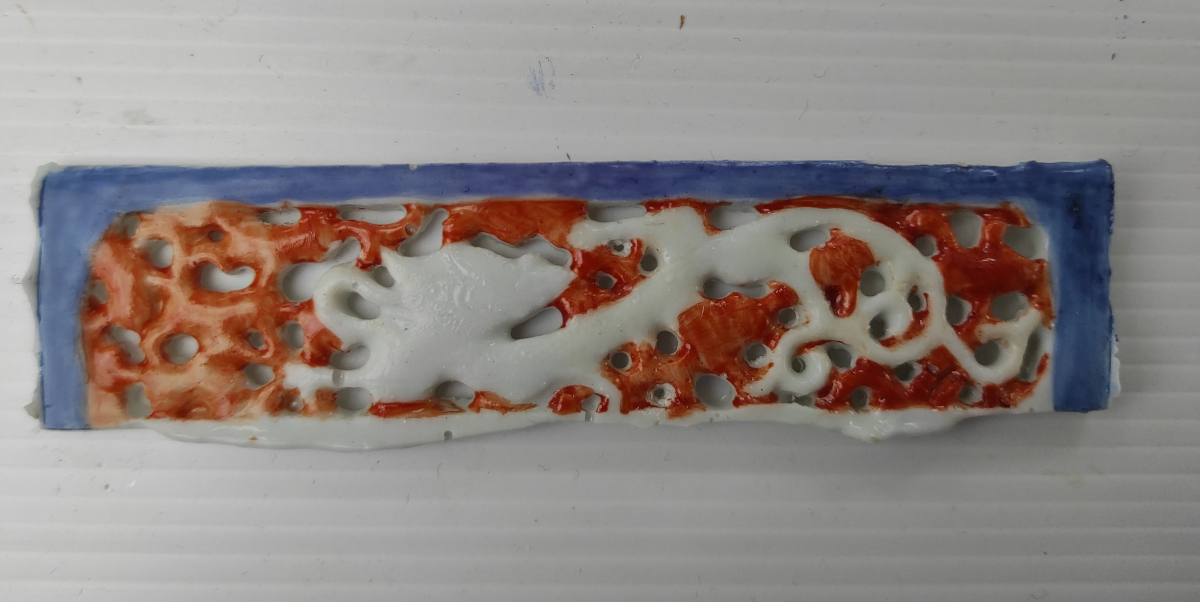
For every successful inpainting, it is important to pay close attention to the ground layer as it is crucial for successful retouch.
Two major factors that will impact the inpainting are texture of the surface and ground colour. As mentioned in previous blogs, our reconstruction was done with crystal clear Hxtal NYL-1 epoxy resin, which gives nice smooth surface similar to ceramic.
Also we added pigments to our casting mixture to come closer to the colour of the ceramic glaze. The second material we used was polyester resin. Previous unfinished restoration attempts had used this material, and our aim was to finish already started work using the same material. This material has an opaque, matt surface, which we polished with sand paper and micromesh to get a smooth surface.

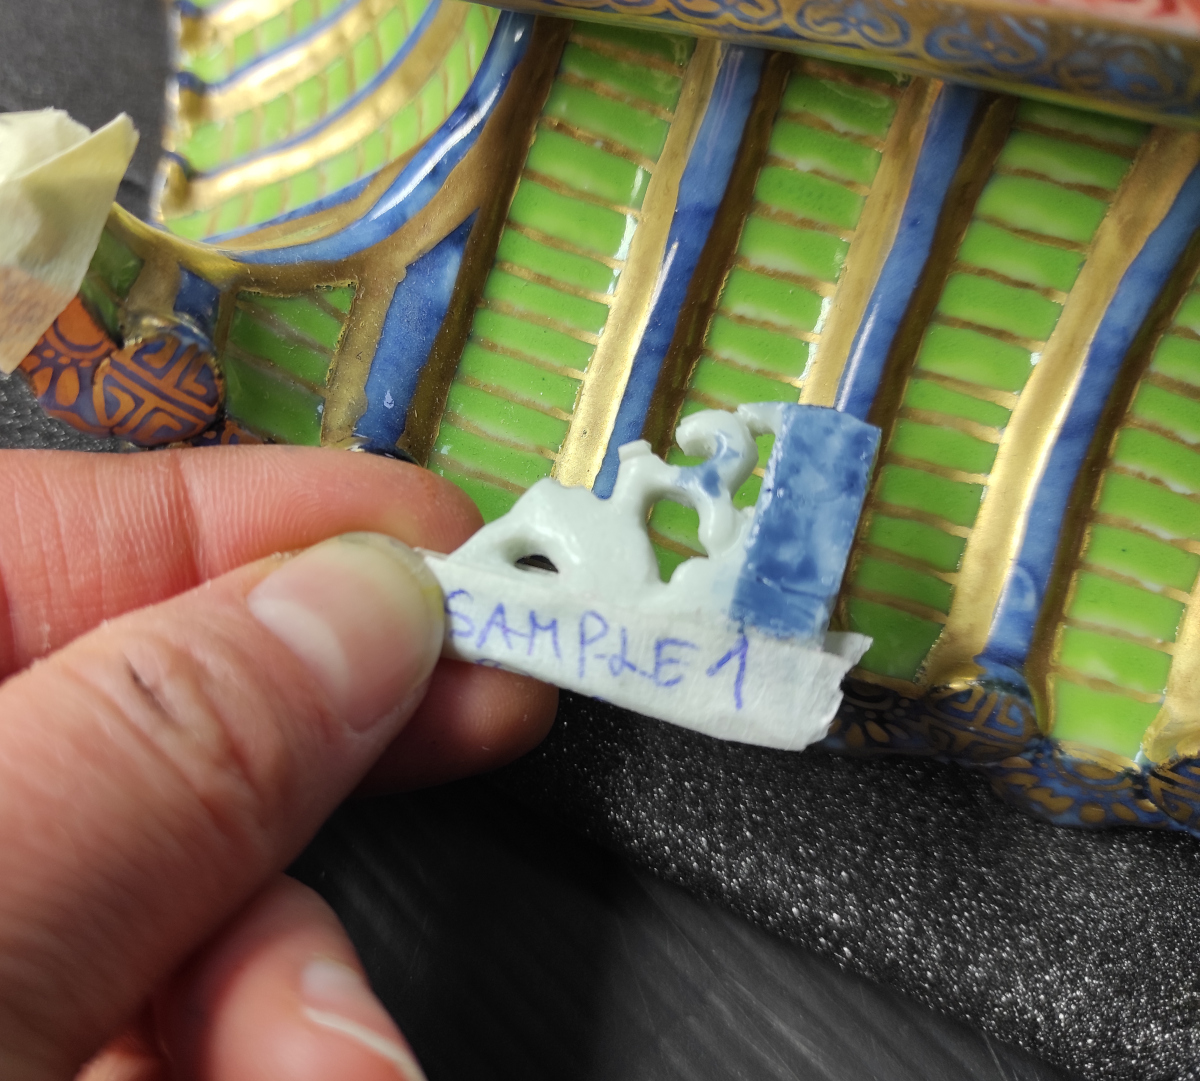
Our testing of colours started earlier last year, where we focused on finding the right colours for our pallet.
We decided to use high quality acrylic colour (the Golden (TM) brand). These colours are easy to remove if required in future conservation work.
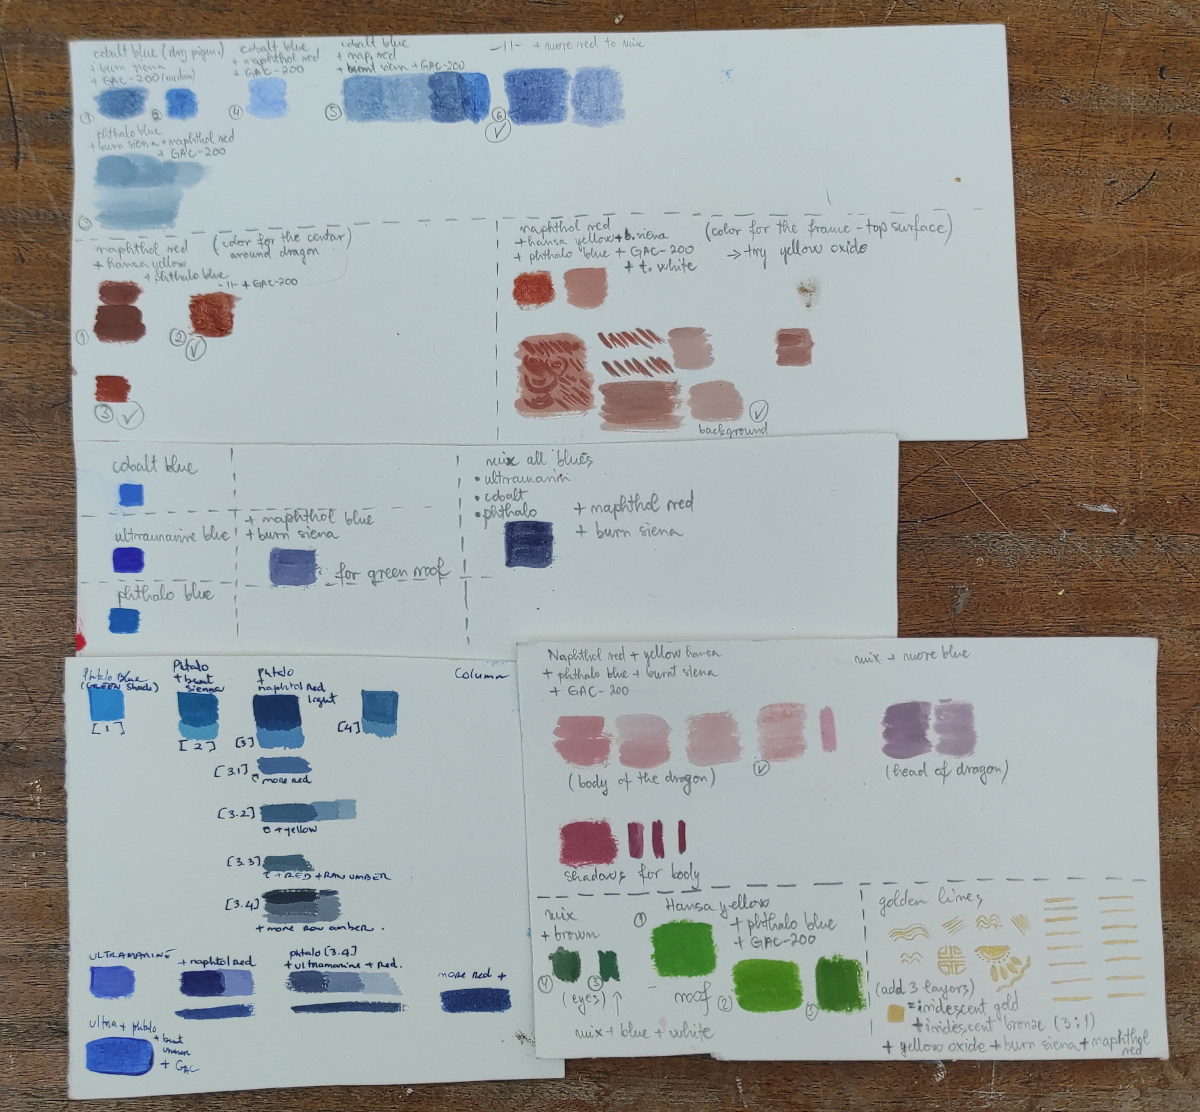
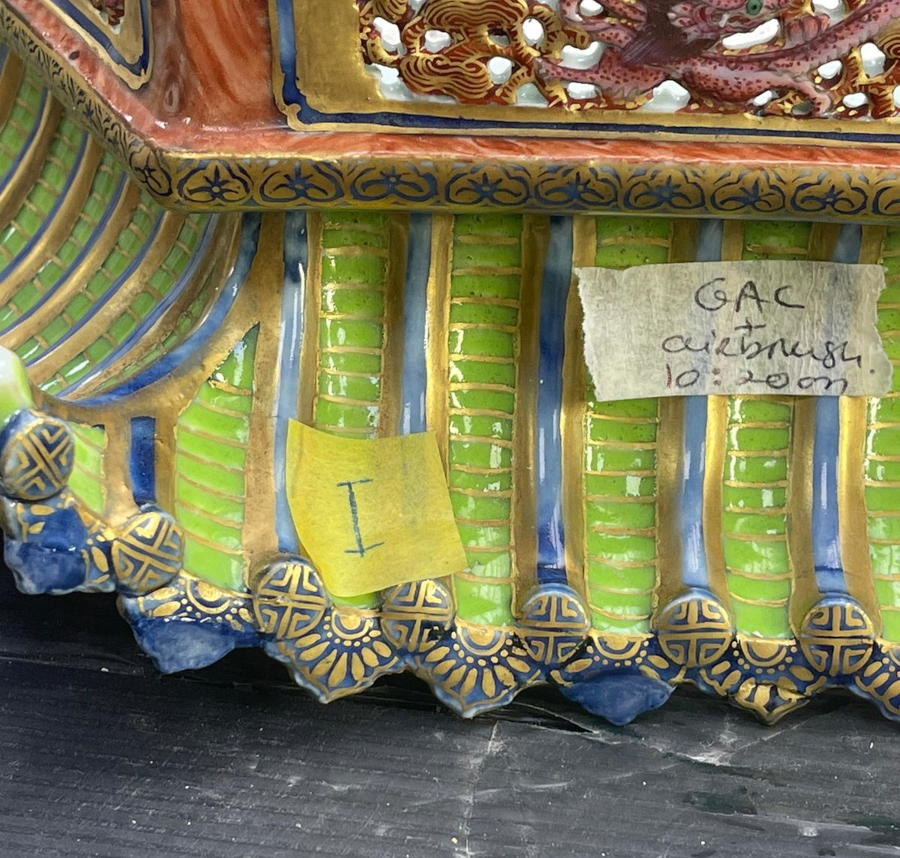
Testing of colours started on a ceramic pallet. We made a scheme of colours on paper which contain information about which pigments were mixed for reference. Colours were tested on Hxtal epoxy resin test surfaces. We also trialled adding Golden (TM) additive mediums Gac-200, Gloss Glazing Liquid and Airbrush Medium. These mediums to were used to improve the flow of the paint during application and the film properties on drying.

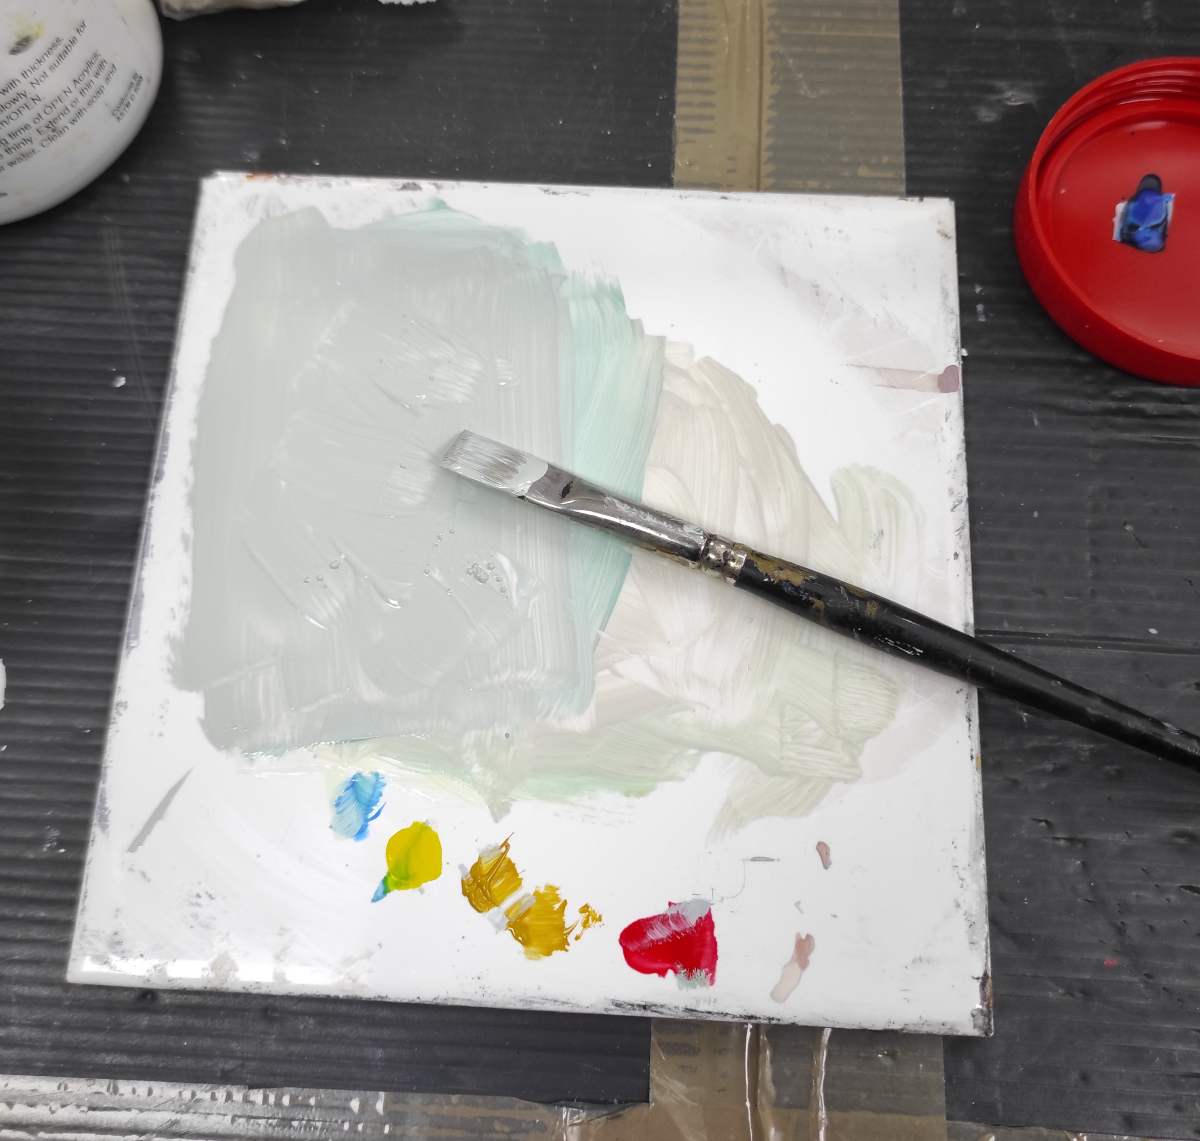
To match the colour of the original as close as possible, it is essential to mix a few pigments in the right proportion.
For example; ultramarine blue paint was mixed with small percentage of pyrole red and burnt sienna to alter the tone to a warmer hue.

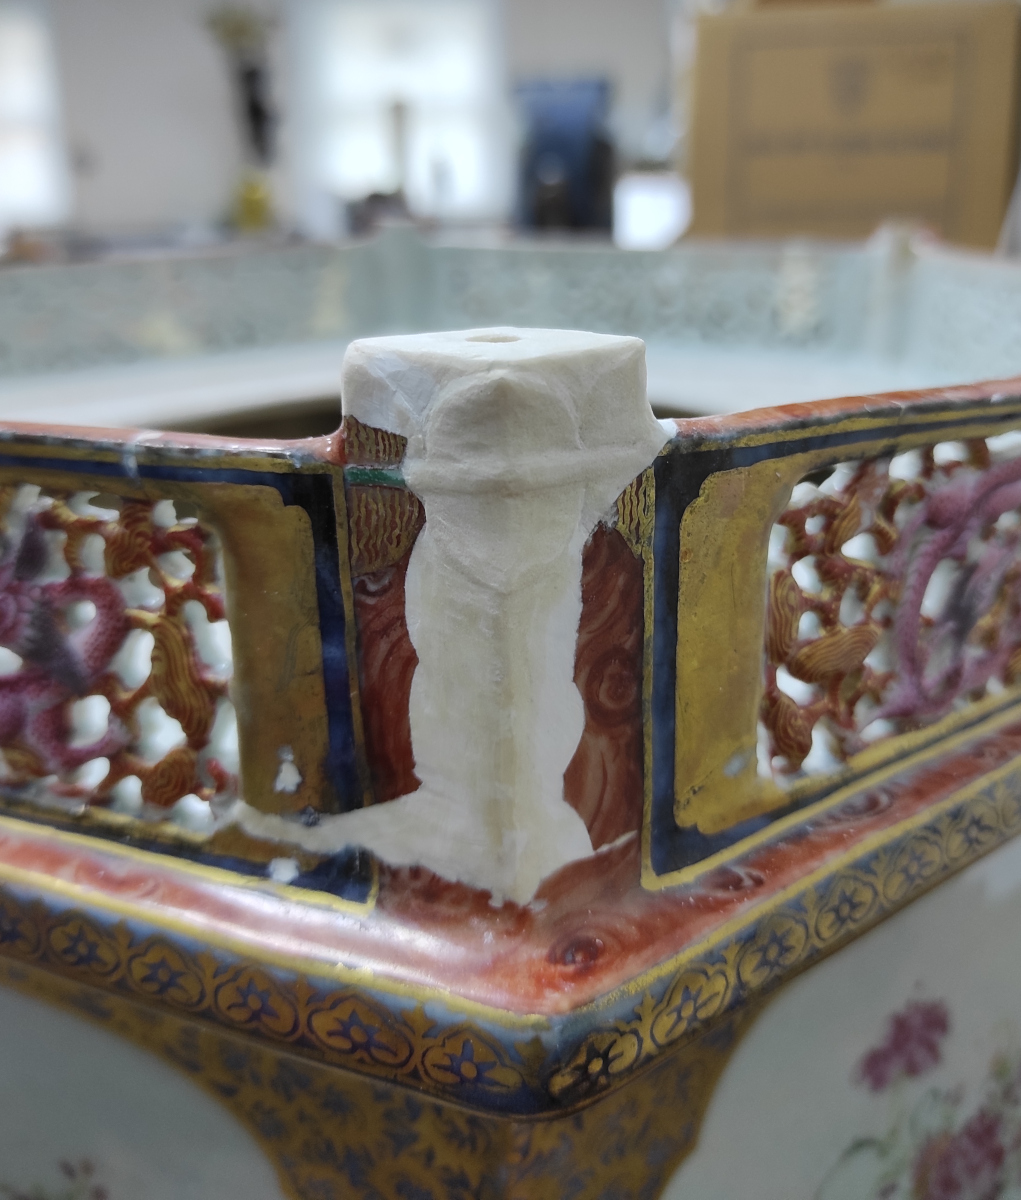
In the prior restoration work, the polyester resin applied is a light grey-brown colour.
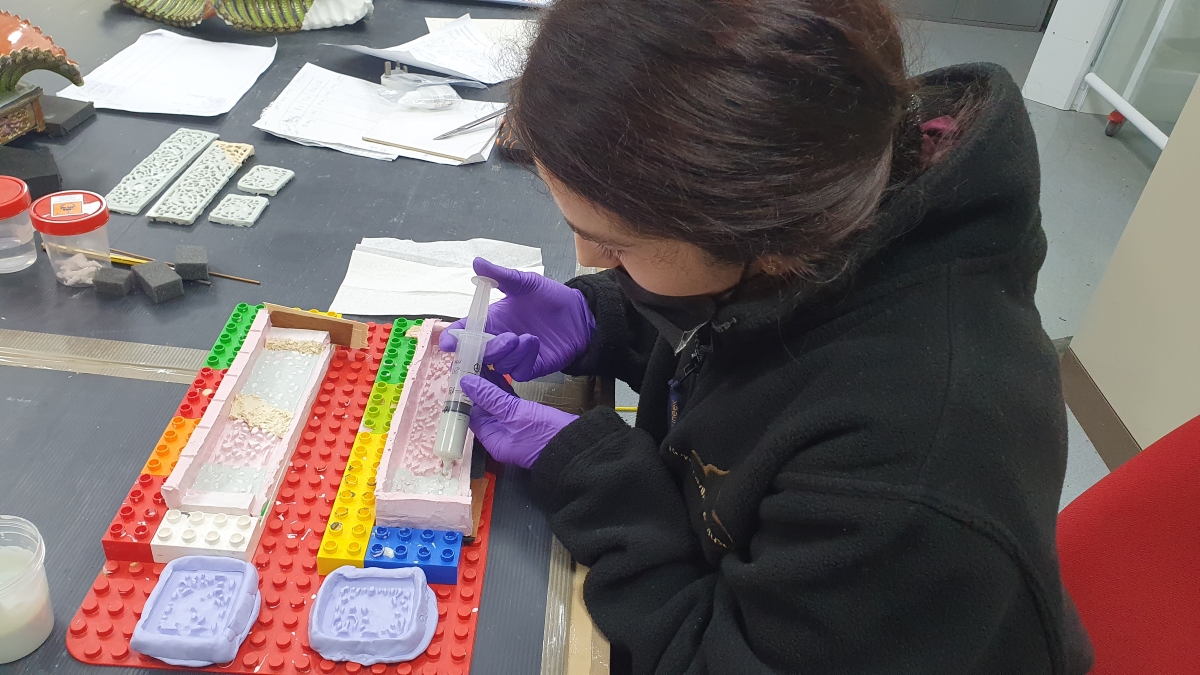
The areas of polyester resin we have applied is a lighter yellow colour. These areas required an opaque paint to be colour matched to the ceramic body underglaze and applied to the polyester resin as a ground layer.
We also used a thinned glaze of similar colour mixes on areas of Hxtal epoxy resin where the surface needed to be slightly altered to match the surrounding orginal ceramic.


Aside from the colour, it was also very important for us to consider the resultant surface gloss level of our painted infills.
Our Hxtal restorations had been formulated to replicate the glossy surface of the original glazed ceramic, however where the surface had been refined and abraded to the correct shape, it was quite matt.
The polyester resin putty results in an entirely matt surface, even with the paint ground layer applied.
To match the gloss level across our restorations, we applied two coats of gloss acrylic varnish Lascaux (TM) Transparentlack 2-UV to them. This gave us the desired effect of surface with a even glossy effect, simulating the surrounding cermaic.

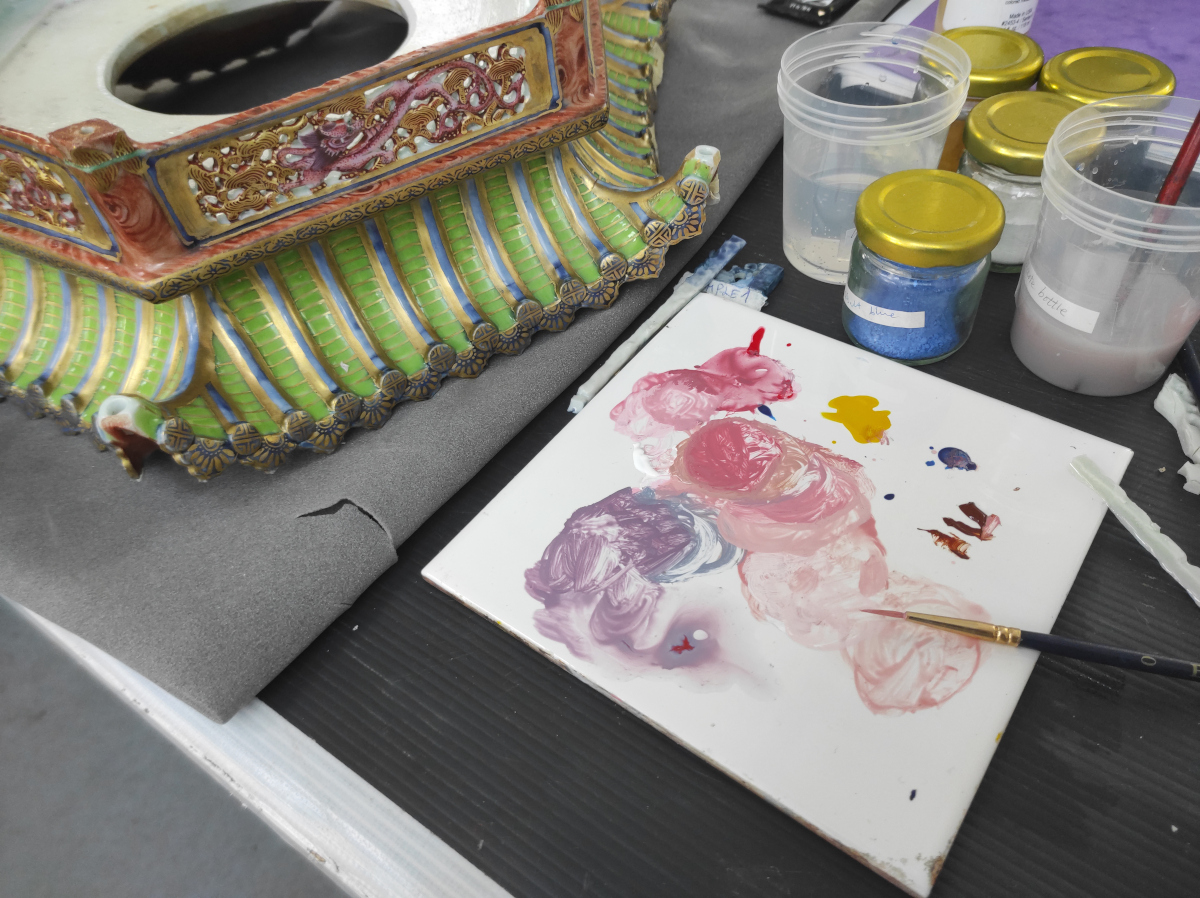
To make our work easier we decided to prepare a colour mix of middle tone in jars for every colour we need for retouch.
This mid-tone could then be adjusted depending on each individual area needing retouching, due to the colour and tonal variation in the original ceramic.
The process of mixing takes trials and searching until the colour mix matches the original.
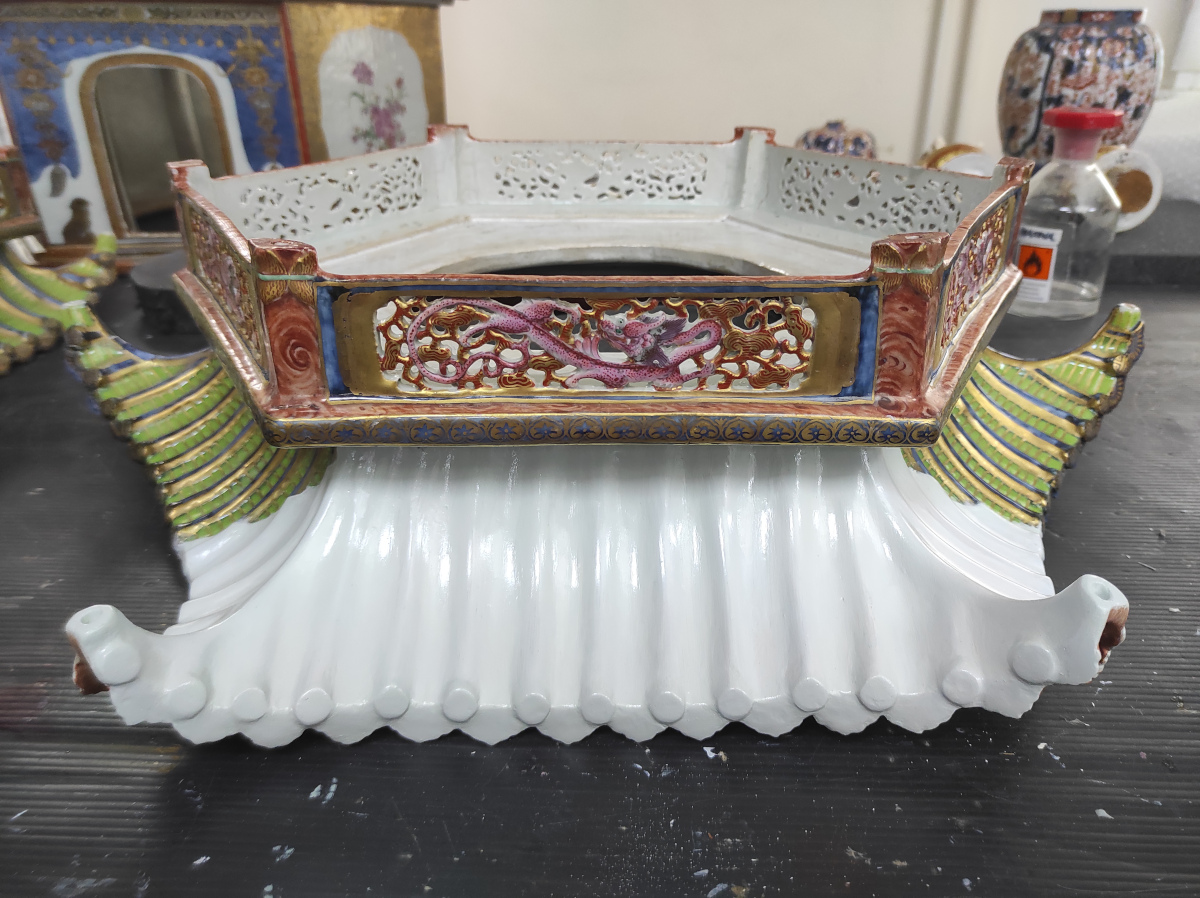
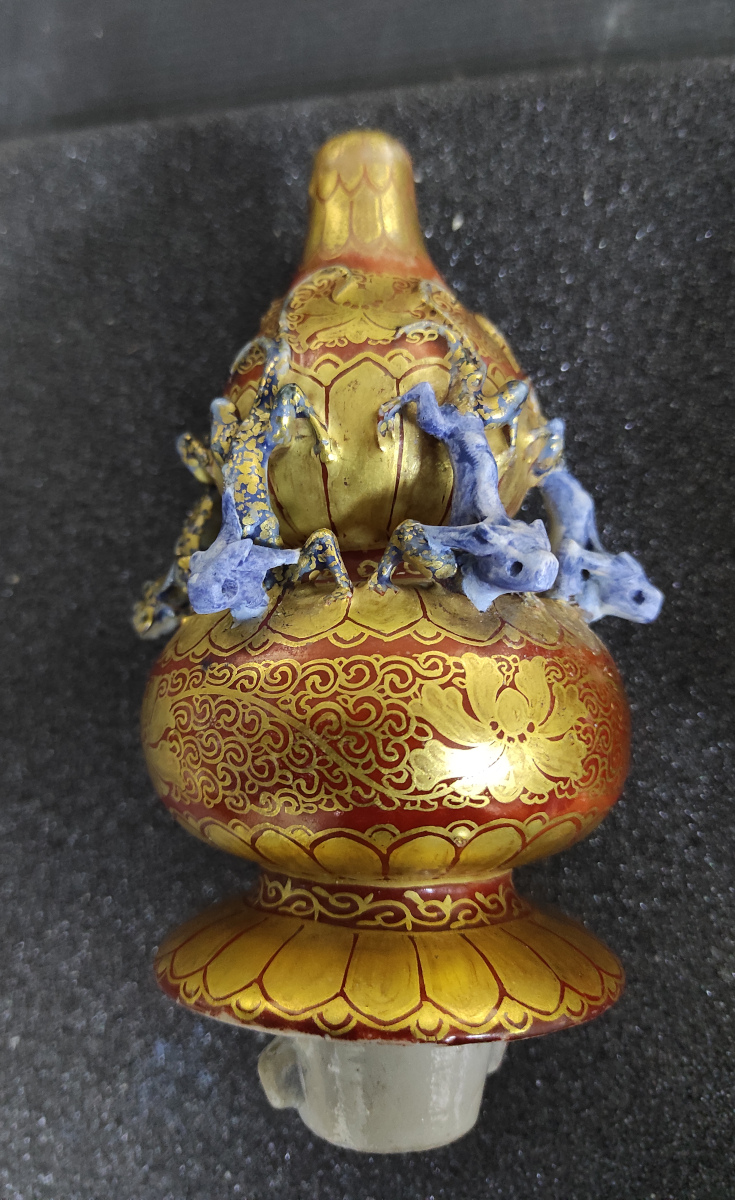
The most dominant colour was blue, which we made in 3 different tones.
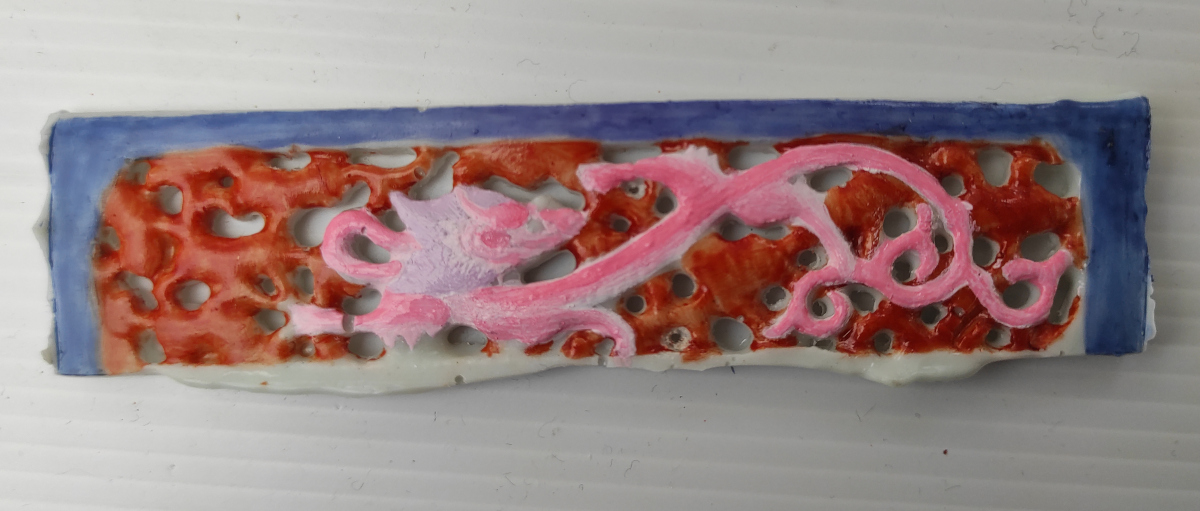
Also, a few tones of pink colour were prepared for retouching the dragons which has varied shades of pink and purple on their bodies.
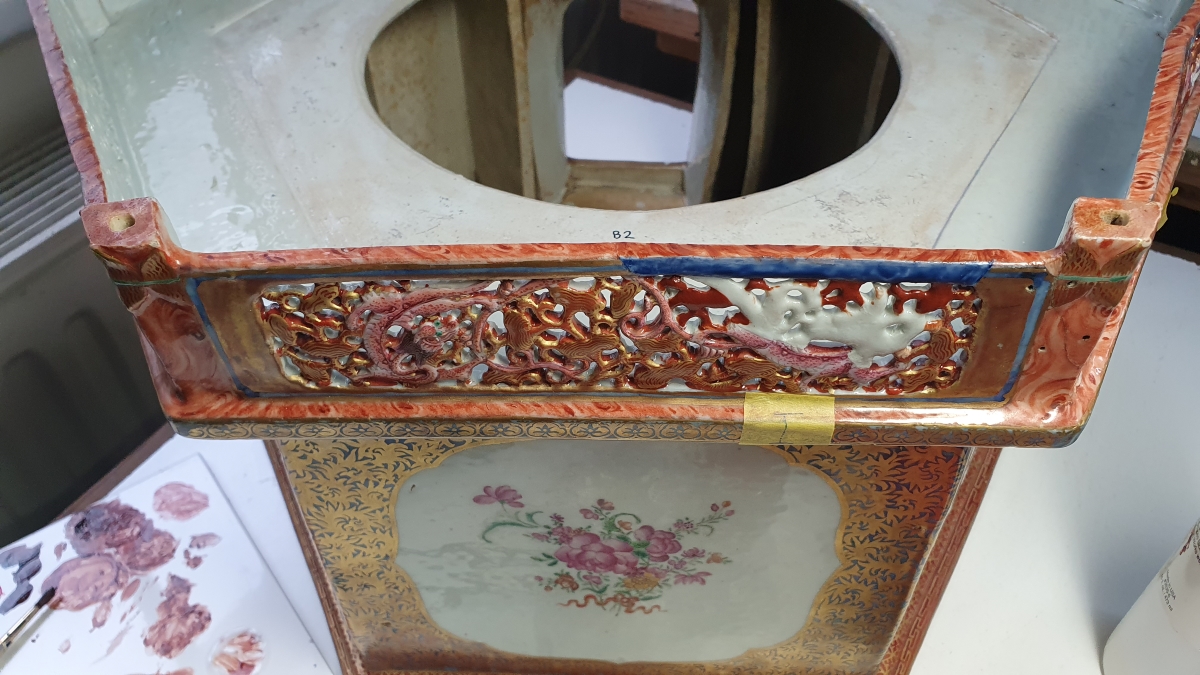
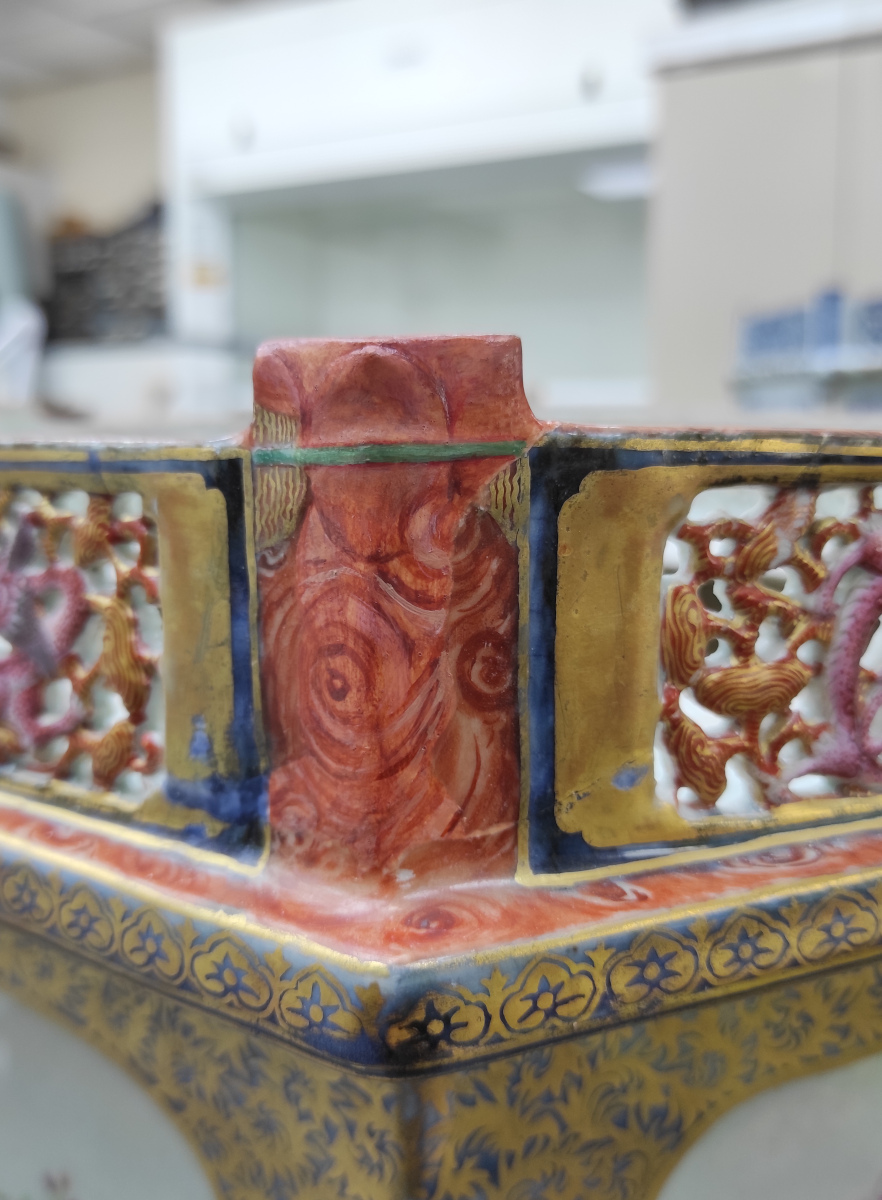
The next colour mixed were red-brown mixes, one for the edges of balustrade and one for ornament surface around the dragons.
During the application of colour we focused to match it with original red-brown glaze.
The most challenging colour was green. The glazed surface has shiny green colour and it was challenging to achieve the desirable colour. We paid close attention to match the colour with original surface of green glaze.
Since we made the colour mix in jar for the whole team, we measured carefully the percentage of every pigment. This approach gave us secure recipes in case if we need to mix more colour in our pallet.

We had to vary the pigment opacity of the paint for different areas of decoration.
Transparent application was necessary for blue areas where we wanted to have a fluid effect of colour with the lighter ‘body’ of the ceramic showing through.
The marble effect on the balustrades and columns was achieved with transparent layers to imitate what appears on the original work. More opaque colours were applied to the green and red area around the dragons. The pink colour on the dragons was applied in thin layers to build the 3D effect that the original decoration has.


Seeing the final result of the inpainting reminded us that the project is getting into its latter stages, but we are happy to see them looking very nearly how they once did.
In the next upcoming blog we will talk about the exciting gilding process where these restored surfaces have their gilding applied and the restoration really comes together.
Stay tuned for our next blog to discover more. If you can’t wait for that, you can have a sneaky peek at a short video showing the gilded decoration appearing on one of the blue balustrades. To see that and the variety of work that the conservation team gets up to, check out and follow behind_the_ropes_rpmt on Instagram.